Even if you use a Chromebook, you may have heard about the Arc browser. It’s a web browser that re-imagines your portal to the web. Unfortunately, it’s macOS-only for now. However, I found a similar third-party browser called Sidekick and have it installed. After using Sidekick on a Chromebook, I think Google could learn a thing or two. In fact, I see Sidekick as how ChromeOS browsing should be in many aspects.
What is the Sidekick browser?
I’ll cover how to install and use Sidekick but it probably makes sense to explain what the Sidekick browser is first.
Essentially, this is a custom browser built on the Chromium source code. That means it’s basically Google Chrome without all of the Google bits. It’s available for Linux, macOS and Windows; I’m using the Linux version on my Chromebook.
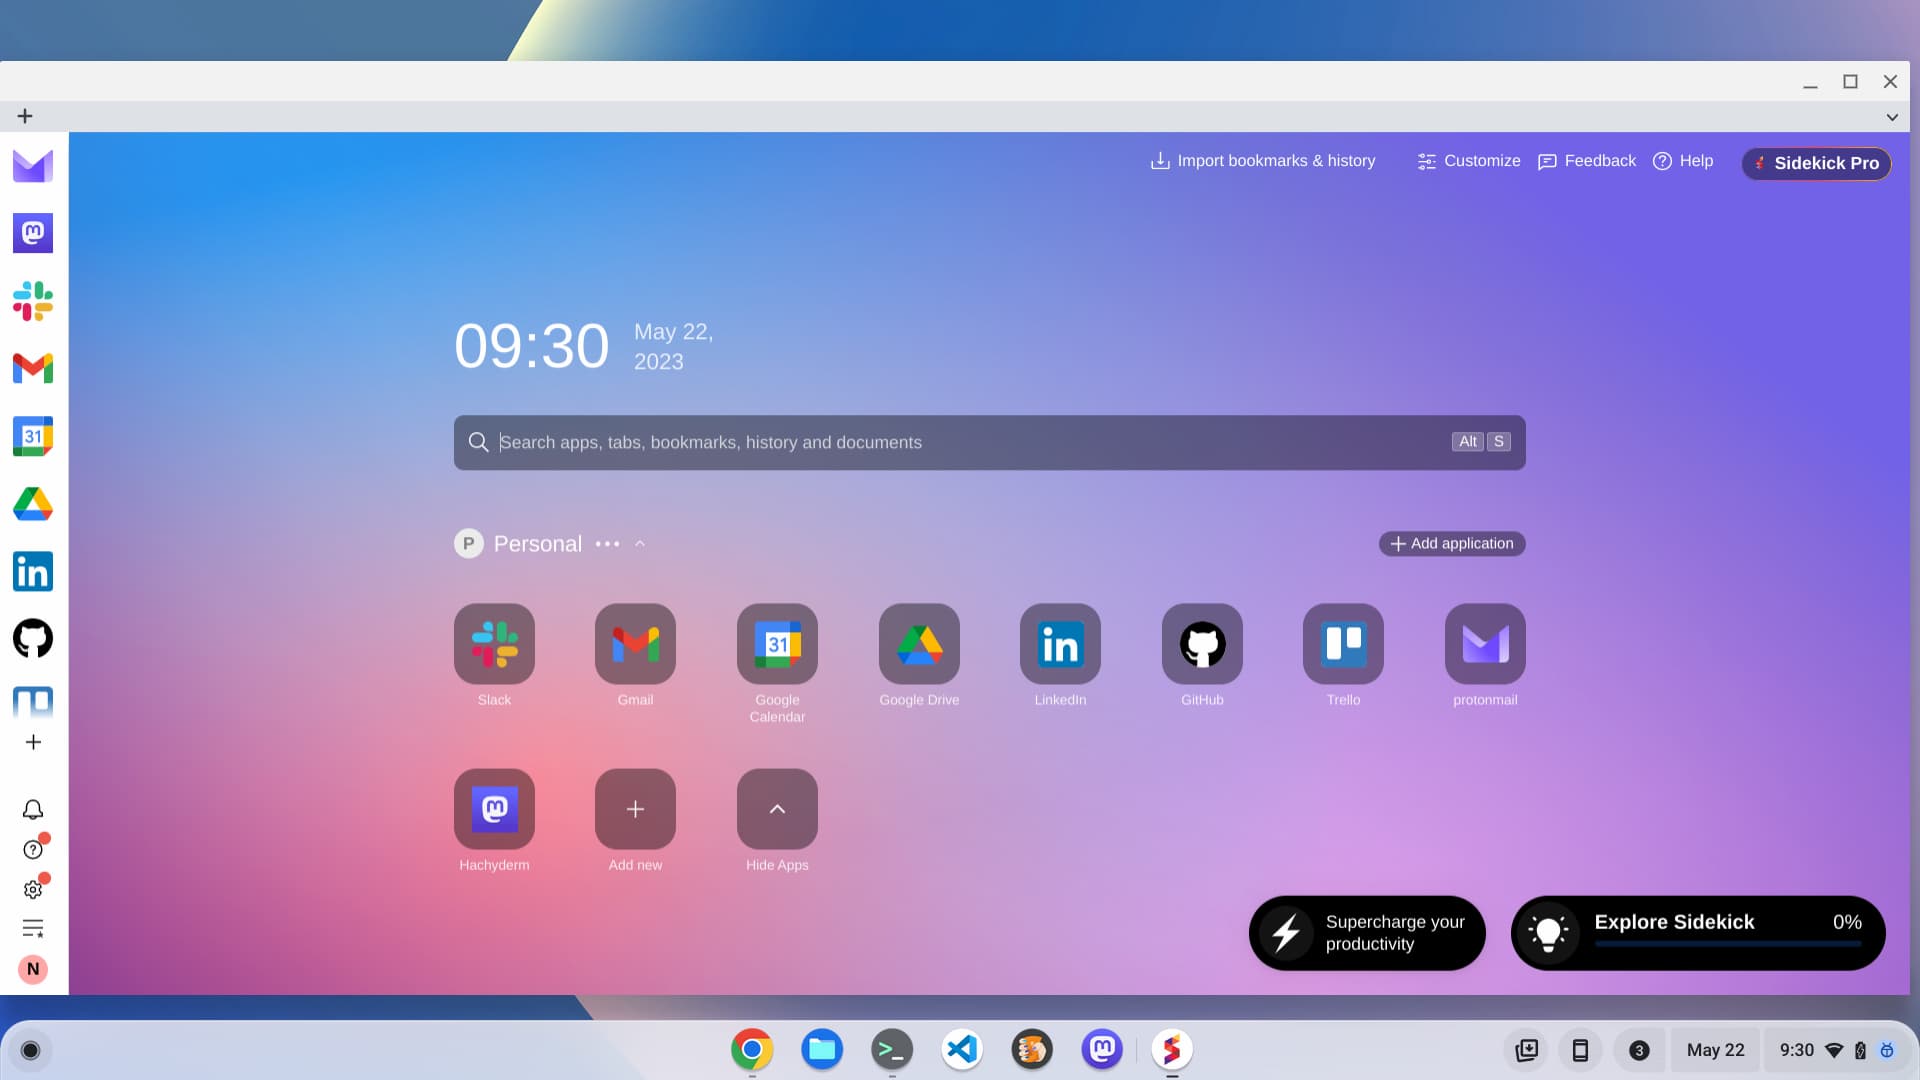
What really makes it different is the addition of some excellent features. You can create “sessions” with saved browser tabs and web apps, for example. And it has an application dock where you have one-click access to specific web apps. Here’s an example of my setup:

Click one of those app shortcuts and your web app appears in front of any other browser tabs or sessions. When you’re done with that app, you can leave it open and switch to a session or close it.
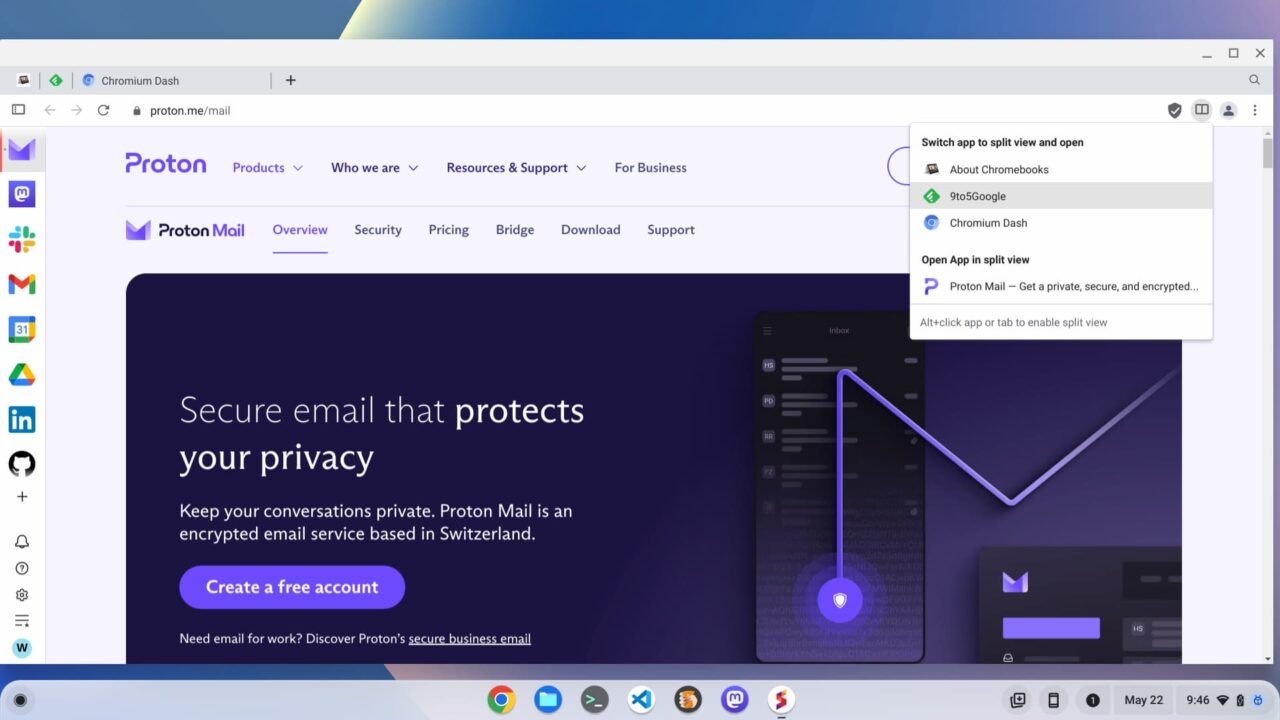
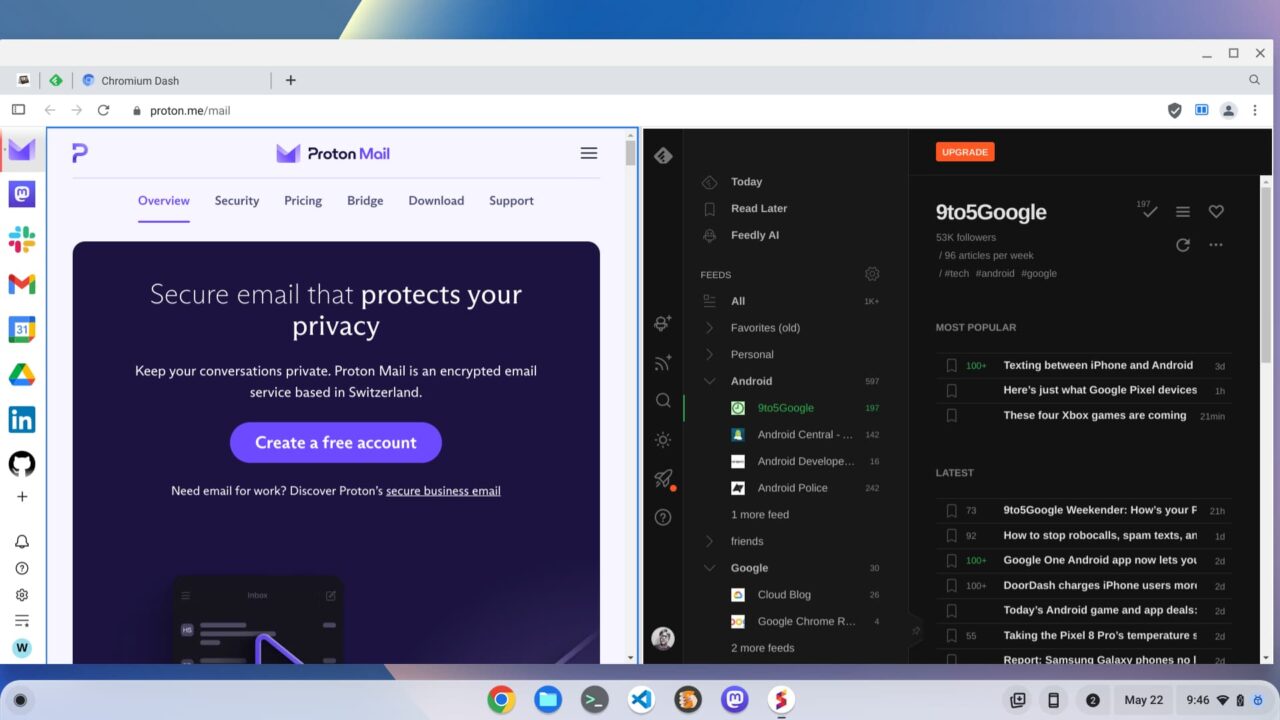
There’s also a split view function for when you need to focus on two web pages. I do this often using email on one side and some other app or web page for writing or research.
There are some other useful functions that I’ll get into shortly.
How to install Sidekick on a Chromebook
As I mentioned prior, I’m using the Linux version of Sidekick. So you’ll need Linux enabled on your Chromebook to do the same.
If you already have Linux on your Chromebook, you can skip ahead to the next step. If not, open your ChromeOS Settings, click the Advanced menu option and click Developers. From here, just follow the setup prompts and in about a minute or so , you should have Linux installed on your Chromebook.
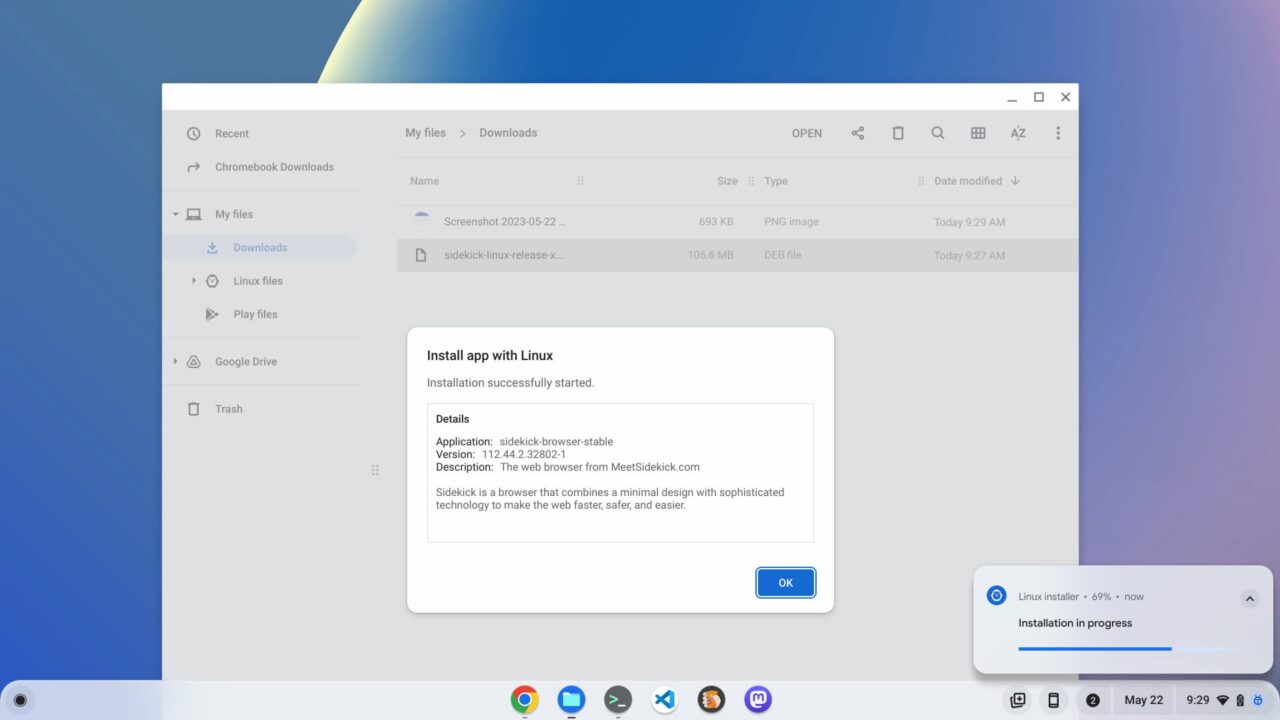
Next, head over to the Sidekick download page using your Chromebook’s browser. Click the “Linux (deb)” option on that page and your download should start. Once complete, head over to your Files app in ChromeOS and find the Sidekick download.
Right click the .deb file that you downloaded and choose “Install with Linux” in the menu.
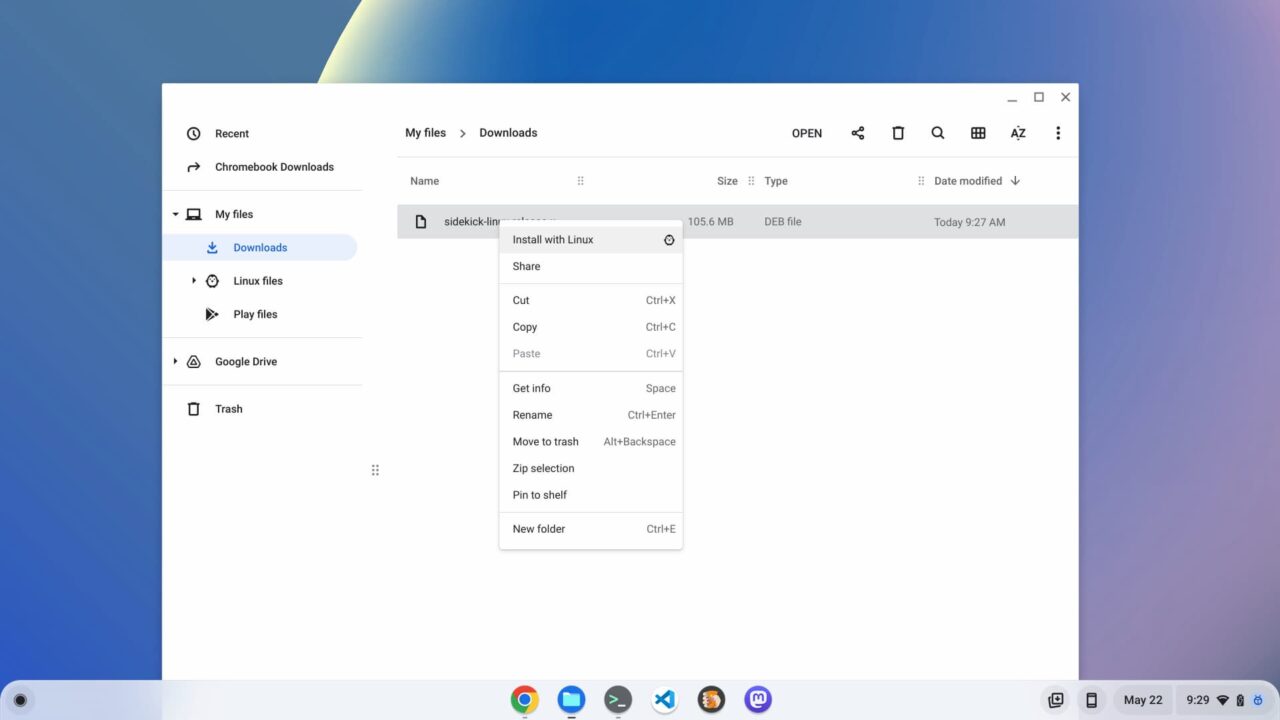
You should see an installation prompt where you can click the “Install” button. Click it and let ChromeOS do it’s thing.
Once the installation is complete, you’ll find a shortcut to the Sidekick app in your ChromeOS Launcher; look in the Linux Apps folder if you can’t find it.
Sidekick browser has plenty of useful features
Although I’ve described the main Sidekick features, I recommend going through the guided introductory walk through. It explains the use of sessions, apps, and app installations very well.
You’ll also find some additional features, such as a built-in ad blocker and VPN. I can’t speak to the data privacy aspect of Sidekick’s VPN. Yes, it will likely keep your data private when browsing but I like to see independent third party reviews of VPN providers. In particular, I want to ensure they don’t log and store your sessions. I use Proton VPN based on my own research.
There’s also a “Quick Join Meetings” feature that integrates with both Google and Zoom.
I’ve enabled it but haven’t taken a call yet. However, I like the idea: A reminder and one-click to get to your meeting.
There’s also a built-in Tasks feature. I doubt I’ll use this for two reasons. One, Google is working to integrate Tasks into ChromeOS. And two, the date in Sidekick Tasks isn’t right. Today is Monday, May 22, not Sunday, May 21.
An optimized workflow using Sidekick on a Chromebook
If you’re familiar with some of the more advanced ChromeOS features, you might be thinking that ChromeOS can already do most of this. And you’d be right.
You can use Tab Groups, for example, to bundle up tabs related to a particular activity. Virtual Desktops can help separate different activities such as, for me, blogging and coding. And the partial split view feature in ChromeOS offers multiple ways to split apps on your Chromebook display.
I won’t disagree with you if you say, “I can already do all of that in ChromeOS”.
Here’s the thing though: I think the Sidekick implementation is both faster and easier to use, making it more effective. That’s my personal opinion of course. There is a slight learning curve when it comes to sessions and apps in Sidekick. You’ll have to try it to form your own opinion.
For me, I see Sidekick on a Chromebook as the way ChromeOS browsing really should be. Simply from a user interface perspective, it feels far more streamlined than how you do the same, or similar, things in ChromeOS. Using the sliding menu panel and built-in keyboard shortcuts, I’m whizzing around the web. And I’m more focused when doing so. A simple keyboard click of alt + w switches between work sessions.
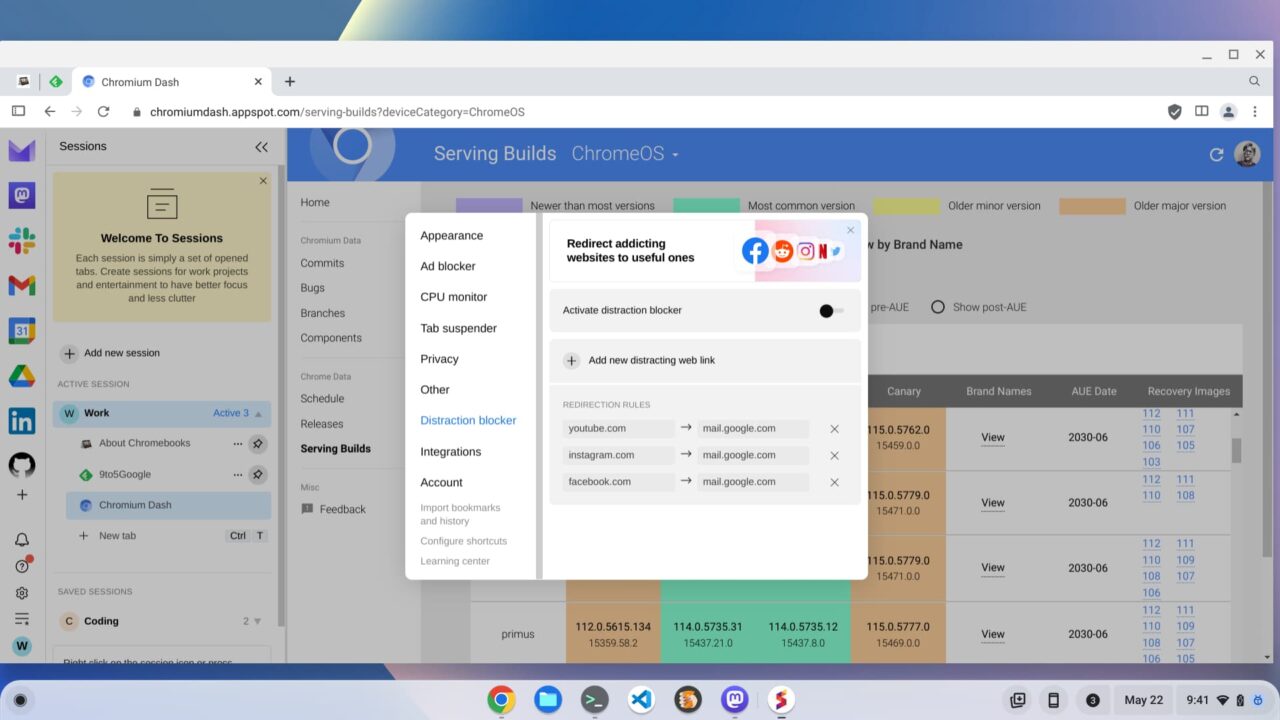
Speaking of being focused, there are two additional features worth a mention. One is “focus mode” which rids the Sidekick interface of your pinned apps. The idea is that you won’t see an app notification and get distracted. You can also redirect time-wasting URLs to productivity sites in this mode. Slick!
The second is the little bell icon that’s always visible. Tap it and you’ve just muted notifications. That’s a two-click function in ChromeOS.
I don’t have multiple Google accounts but I know some Chromebook users do. If you have a Google app pinned, such as Gmail or Google Calendar, you can right click it and add multiple accounts. That should help with account switching, assuming it works properly. Again, I don’t have multiple accounts so I can’t test this. This option is available for many web apps, not just those from Google.
You don’t pay with your data, but you do pay
If Sidekick on a Chromebook sounds wonderful, it mostly is. I’ve been able to use it for my typical Chromebook browsing usage, even to write this post on WordPress. I will note that switching between sessions causes tabs to reload. If you’re doing any online work that you want saved, you should make sure to do that before switching. And since the tabs reload, which helps reduce memory used on your Chromebook, the reload process will take a second or two. Personally, that didn’t bother me.
And there is a bit of a catch. Since the company doesn’t share your data with third-parties, it has to make money somehow. And that comes in the form of a subscription.
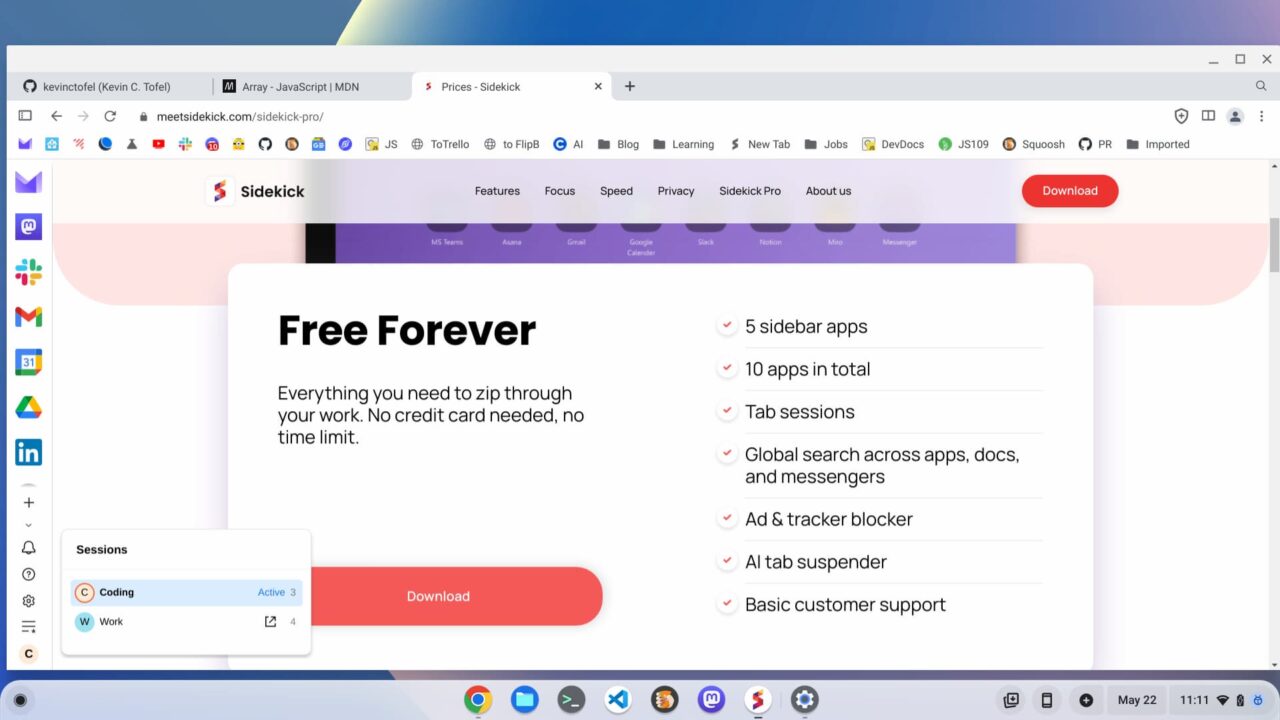
You can use Sidekick for free and for the first 30 days you’ll have access to Sidekick Pro. After that, it’s $10 a month when paid annually or you lose much of what makes Sidekick so useful.
The free version includes:
- 5 sidebar apps
- 10 apps in total
- Tab sessions
- Global search across apps, docs, and messengers
- Ad & tracker blocker
- AI tab suspender
- Basic customer support
So if you don’t pay the subscription fee, you’ll be limited by the number of sidebar apps you can have, you’ll lose the awesome sessions feature as well as Split View and a few other things.
I’m not going to complain about that because I get it. Companies develop services or software and it costs money to do that. I’m still in my trial period so I haven’t decided yet if I’m going to be a paid subscriber. Note that Sidekick does have a referral / invite process. You earn a free month with 5 subscribers, 6 months with 10 subs and 20 signups gets you the service for life.
I don’t know what the long-term business plan is for the Sidekick browser folks, but part of me wants to see Google purchase the company. Even if not all of the features and design elements make it over to ChromeOS in that situation, I think Chromebook users would benefit from Sidekick’s influence. Anyway, I’d love to know what you think if you’ve given Sidekick a try.
The post Sidekick on a Chromebook: A better browser for ChromeOS appeared first on About Chromebooks.