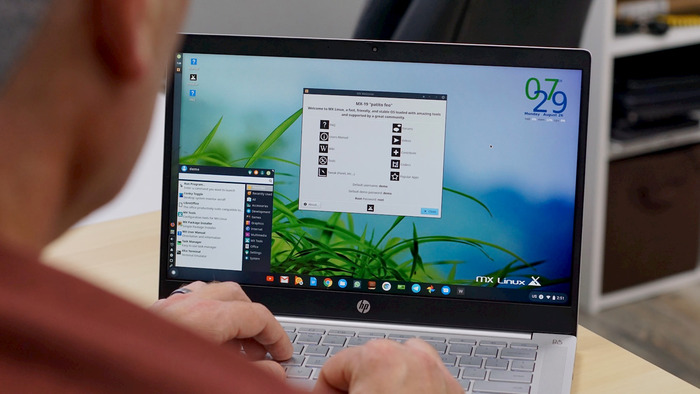
Chromebooks are known for their simplicity and cost-effectiveness, but some users want more than just Chrome OS’s limited app functionality.
Adding Linux to your Chromebook can uncover a wide range of capabilities, allowing you to use powerful Linux-based applications.
Here’s a comprehensive article on how to set it up and what you’ll need.
Requirements to Install Linux on a Chromebook

Before you jump into the Linux setup, gather a few essentials for a smoother experience:
- Intel-based Chromebook: While some ARM-based Chromebooks may support Linux, an Intel processor provides excellent compatibility, particularly with more advanced applications. For the best experience, consider using models like the Acer Chromebook Spin 713, Dell Chromebook 11, or HP Chromebook x360.
- Basic Linux Knowledge: Familiarity with Linux commands and the terminal will help you handle your new setup more effectively. If you’re new, consider browsing online forums, such as the Ubuntu Forums or Linux subreddits, for guidance.
- Recovery Disk: Installing Linux can involve trial and error, so creating a recovery disk is highly recommended. Use the Chromebook Recovery Utility to create a backup on a 4GB or larger flash drive, enabling you to restore Chrome OS if needed.
- Developer Mode Activation: Some methods require Developer Mode, which can make your Chromebook less secure. Proceed with caution and keep your recovery disk handy if anything goes wrong.
With these basics ready, let’s move forward with installing Linux.
Installing Linux Applications Using Crostini
Google offers an official way to run Linux apps on a Chromebook through Crostini (sometimes called “Linux” in the settings menu).
This method runs Linux applications in a secure container within Chrome OS, making it one of the safer ways to experiment with Linux apps without compromising Chrome OS.
Steps to Enable Linux with Crostini:
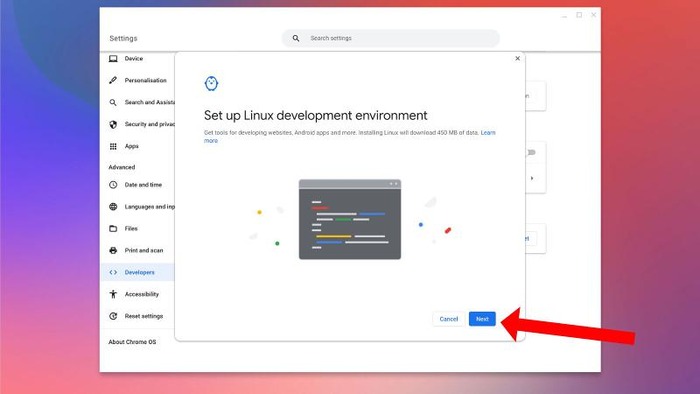
- Click the clock in the bottom-right corner of the screen and open the Settings menu.
- Scroll down to the Linux development environment section.
- If this option is unavailable, your device doesn’t support Crostini, and you’ll need to explore other methods below.
- Click Turn On and then Install to activate Linux.
- Allocate the necessary disk space, then open the Linux terminal.
Updating Linux for Initial Setup:
In the Linux terminal, type the following commands, pressing Enter after each:
bash
Copy code
sudo apt update
sudo apt upgrade
These commands update your Linux system. You can run them later to keep your Linux software current.
Installing Applications (Example: GIMP):
Now, let’s install a Linux app like GIMP (or any other you prefer). In the terminal, type:
bash
Copy code
sudo apt install gimp
After installation, find GIMP (or other installed apps) in Chrome OS’s Linux Apps folder.
Accessing Chrome OS Files in Linux:
Linux apps cannot directly access your Chromebook’s regular folders. To open a downloaded file, drag it to the Linux Files folder in Chrome OS’s file manager.
If issues arise, the /r/crostini subreddit is an excellent resource for troubleshooting.
Running a Full Linux Desktop Using Crouton

For devices that don’t support Crostini, Crouton is a popular alternative.
This method installs an Ubuntu desktop within Chrome OS, giving you access to a whole Linux experience alongside Chrome OS.
Steps for Setting Up Crouton:
- Activate Developer Mode:
- Turn off your Chromebook, hold down the Esc and Refresh keys, then press Power.
- At the recovery screen, press Ctrl + D and confirm to disable OS verification.
- Note: Every time you boot your Chromebook, you must press Ctrl + D to skip the OS verification screen.
- Download Crouton:
- From Chrome OS, download the Crouton script.
- Open the Chrome OS terminal by pressing Ctrl + Alt + T, type shell, and press Enter.
- Run the Installation Command:
Run the following command in the terminal to copy Crouton to the executable folder:
bash
Copy code
sudo install -Dt /usr/local/bin -m 755 ~/Downloads/crouton
Then install the XFCE desktop environment (or another of your choice) with:
bash
Copy code
sudo crouton -t xfce
- This may take some time, so be patient.
- Access the Linux Desktop:
Once installation finishes, enter your Linux environment by typing:
bash
Copy code
sudo enter-chroot startxfce4
You can now switch between Chrome OS and Linux desktops using Ctrl + Alt + Shift + Back and Ctrl + Alt + Shift + Forward.
To enhance this setup, explore Crouton’s GitHub page, which provides tips on clipboard sharing, updating Ubuntu, and securing your Linux environment.
Always keep your recovery disk handy to restore Chrome OS if needed.
Setting Up Dual-Boot with Gallium for an Independent Linux Installation
For advanced users seeking a separate Linux installation, dual-booting allows Linux to run independently alongside Chrome OS.
This requires more storage space and familiarity with partitioning drives.
Requirements for Dual-Boot Setup:
- A compatible Chromebook
- Developer Mode enabled
- A tool called chrx for setting up the dual-boot
Steps to Install GalliumOS or Other Linux Distributions with chrx:
- Enter Developer Mode (as outlined in the Crouton method).
- Download chrx Installer:
- Open the Chrome OS terminal with Ctrl + Alt + T, type shell, and press Enter.
Run the chrx Preparation Command:
bash
Copy code
cd ; curl -Os https://chrx.org/go && sh go
- Follow the installer prompts to partition your drive and restart.
- Install GalliumOS (or another Linux distribution, such as Ubuntu or Fedora) by re-running the chrx command.
When complete, you can reboot into your chosen Linux environment by pressing Ctrl + L at startup. Press Ctrl + D to boot back into Chrome OS.
While dual-booting provides more customization, it also requires handling drivers and software setup specific to your hardware.
For those comfortable with Linux, this approach offers extensive control over your Chromebook.
Restoring Chrome OS If Needed

If you decide to revert to Chrome OS, turn off your Chromebook. Hold down Esc and Refresh, then press Power to boot up.
Insert the recovery drive you created, and follow the prompts to restore the original Chrome OS settings.
Bottom Line
Adding Linux to your Chromebook expands its capabilities significantly, but each method has unique pros and cons.
Whether you use Crostini for lightweight Linux apps, Crouton for an entire desktop, or a dual-boot setup with GalliumOS, this guide should help you maximize your Chromebook.
The post How to Run Linux on Your Chromebook? appeared first on About Chromebooks.

