This guide covers how to create and open zip files on a Chromebook using the ChromeOS Files app, making it easy to manage compressed files.
How Can You Zip Files on a Chromebook?
You can compress files directly within ChromeOS’s built-in Files app.
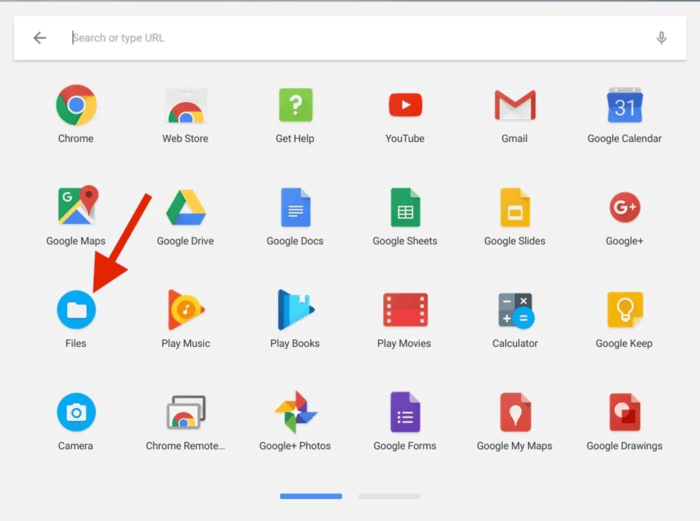
1. Open the app launcher and select Files.

2. In the left sidebar, find the files you want to compress. Use the following methods to select files:
- To select a range of files, click the first file, hold down Shift, and click the last file.
- For individual selections, hold Ctrl and click each file.
- To select all files in a folder, press Ctrl + A.
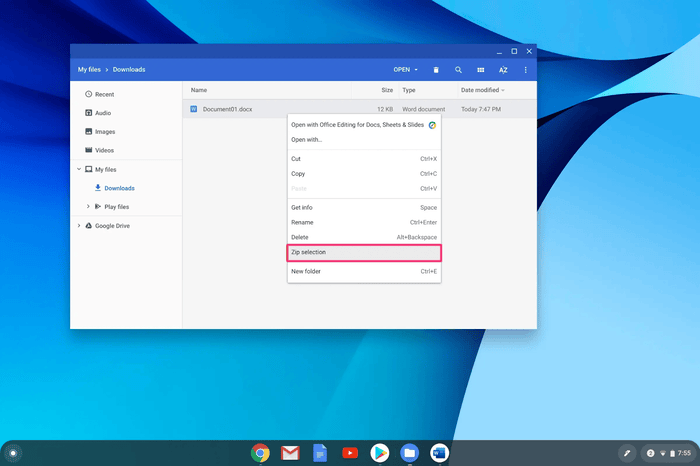
3. Right-click the selected files and choose Zip selection. The compressed file, named Archive.zip, will appear in the same folder. If you zipped a folder, the zip file will have the same name as the folder but with a .zip extension.

- To rename the zip file, right-click it and select Rename.

How Do You Unzip Files on a Chromebook?
Unzipping files on ChromeOS involves extracting them manually rather than unzipping the archive as a whole.
- Find and double-click the Archive.zip file in the Files app to open it and view the contents.
- Select the files you want to extract, right-click, and choose Copy.
- Go to the folder where you want to place the extracted files, right-click, and select Paste. The copied files will appear in this new location and be ready for editing.
- Files in a zip folder can be opened without extraction, but changes cannot be saved to them.
- Once finished, click Eject next to the archive in the Files app’s left sidebar to close the zip file.
The post How To Unzip Files On Chromebook? appeared first on About Chromebooks.

