Taking a screenshot on a Chromebook isn’t the most intuitive action to find but it’s a simple keyboard shortcut or button away. Or rather one of a few simple shortcuts, since this functionality has evolved over time in Chrome OS. Here I’ll cover each of the ways so you can pick the way how to screenshot and edit on a Chromebook that works best for you.
How to screenshot on a Chromebook for the full screen
To capture the full screen:
- Press the ctrl and switch window (typically above the number 5 or 6 key) keys on your keyboard at the same time.
- You’ll find the screenshot will be saved as a .png file in the Files app of your Chromebook.
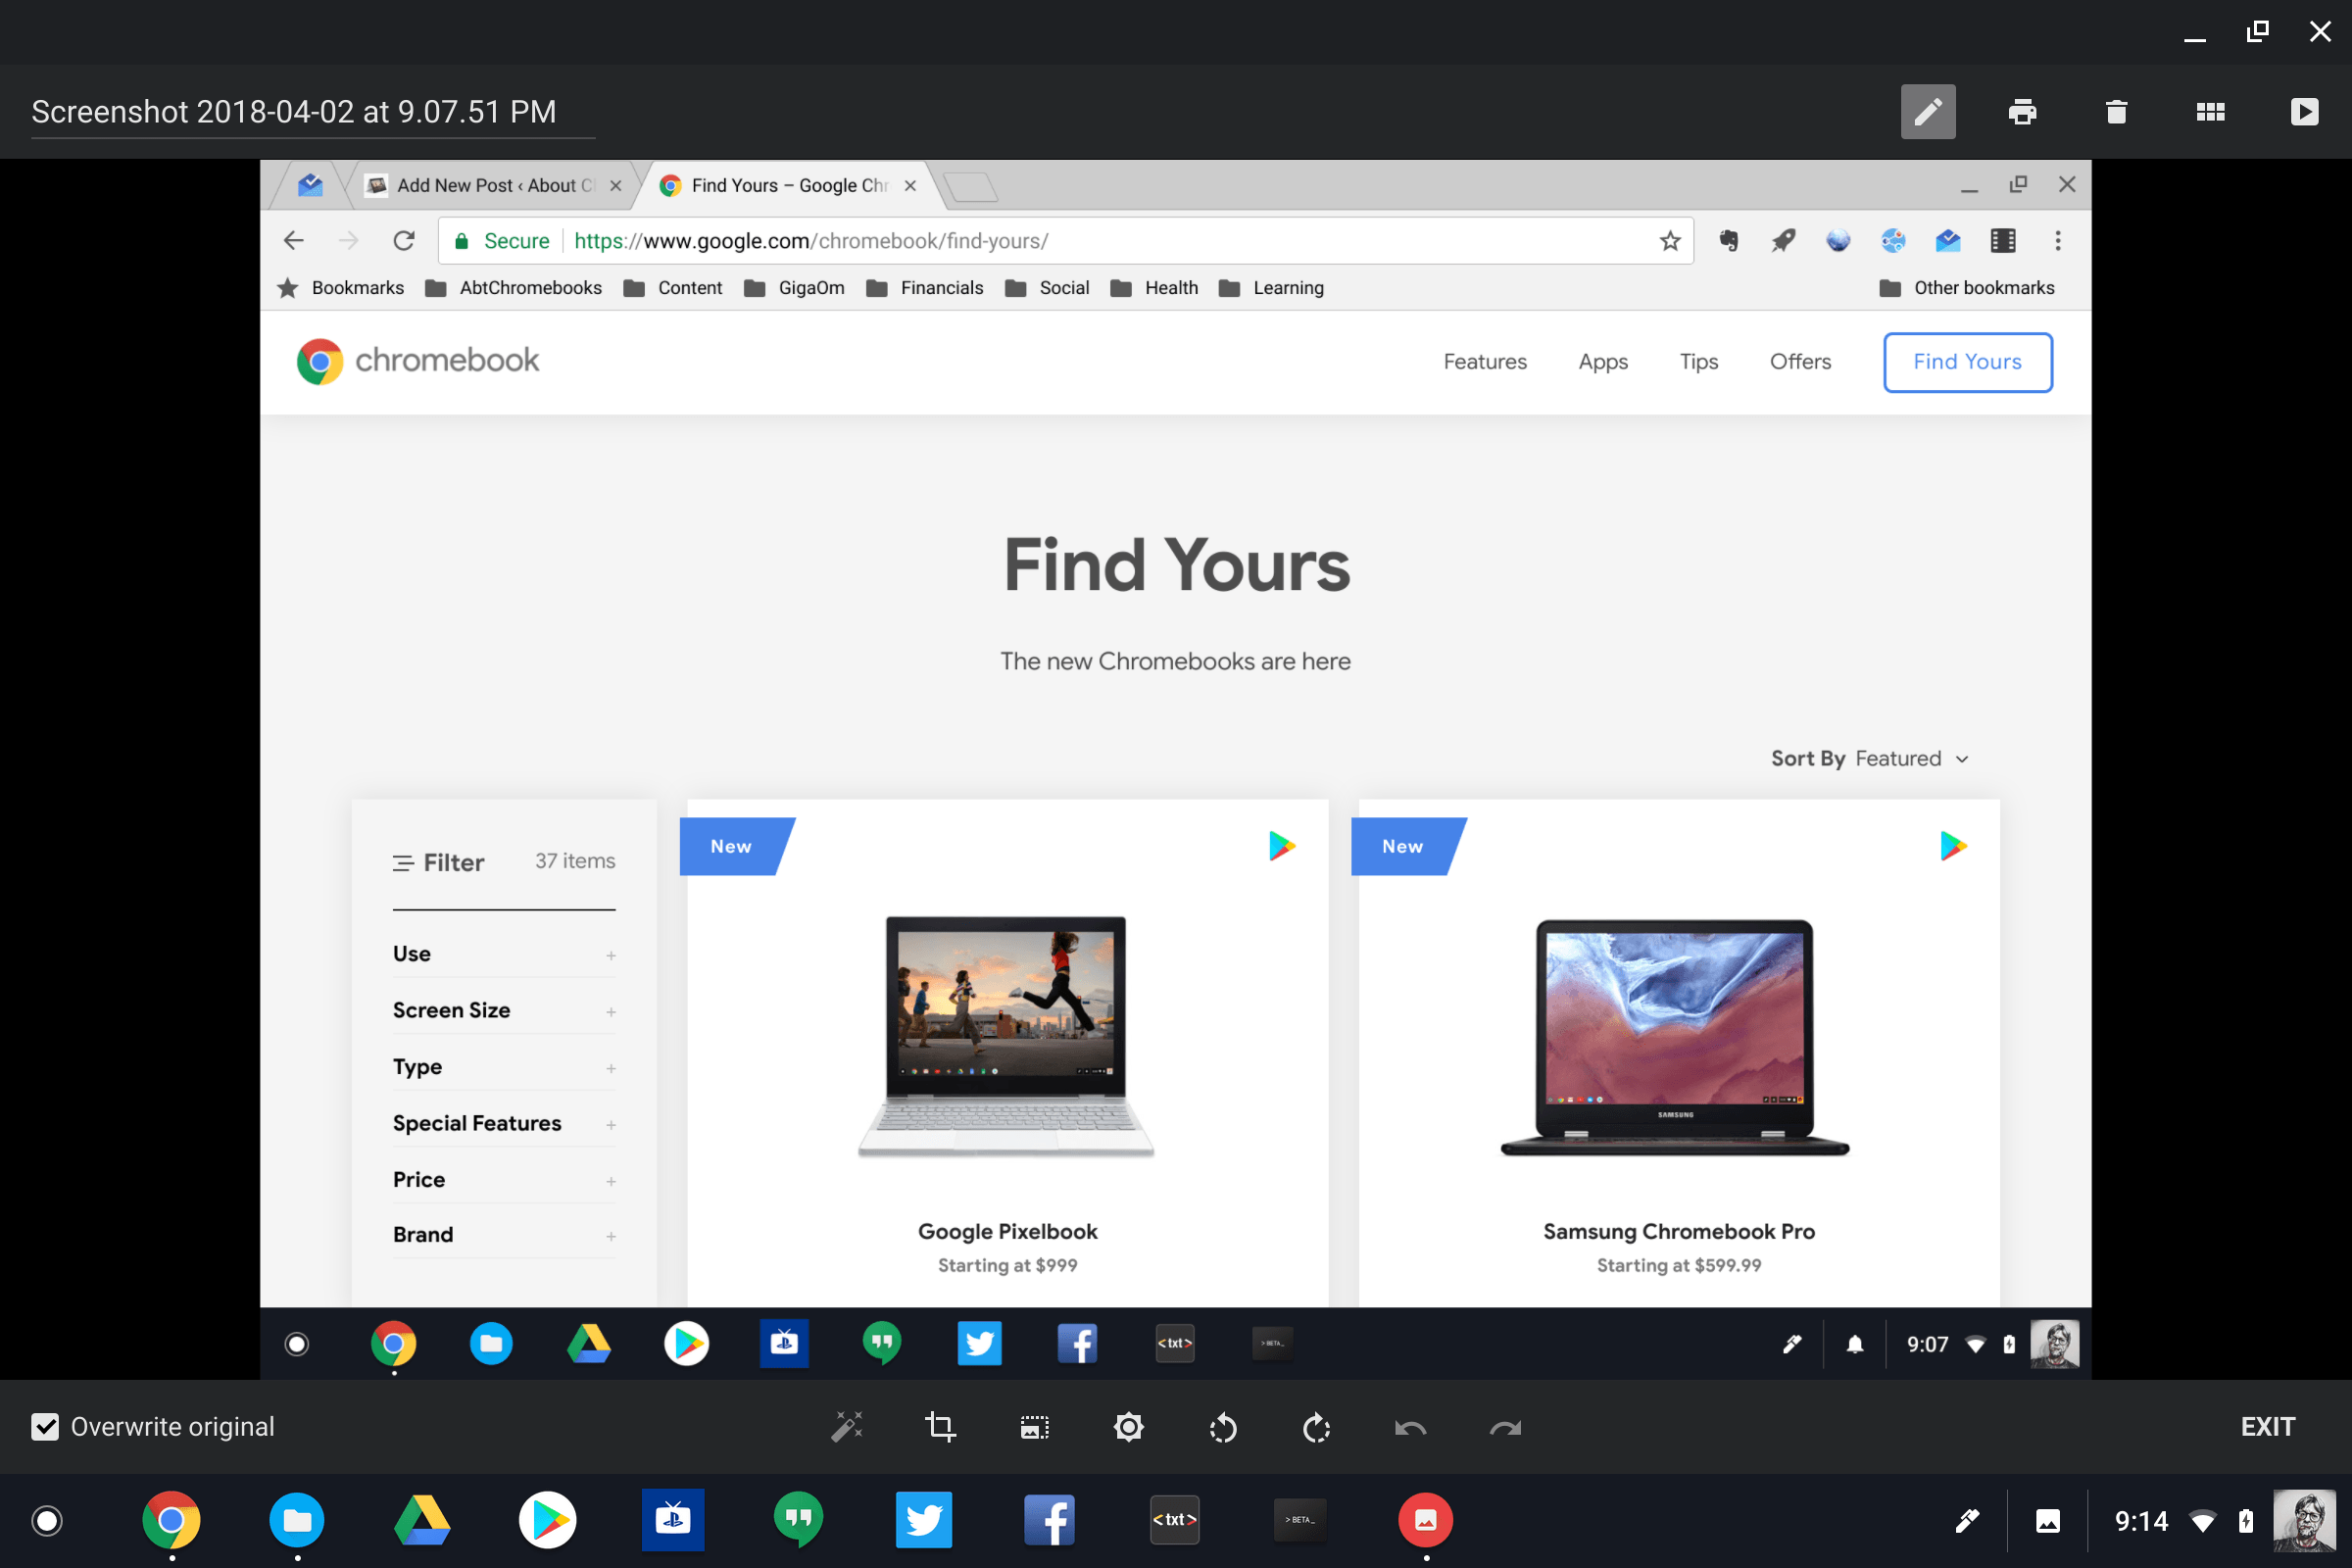
- Here’s an example of my full desktop on the Pixelbook using this method:
How to screenshot on a Chromebook for part of the screen
- Press the ctrl, switch window (typically above the number 5 key), and the shift keys on your keyboard at the same time.
- You’ll see a little cross-hair style cursor, similar to a mouse cursor, on your screen. Click on your trackpad and move the cursor to dynamically select which section of the screen you want captured.
- Once you have the correctly sized outline of the partial screen, click inside the outline.
- You’ll find the screenshot will be saved as a .png file in the Files app of your Chromebook.
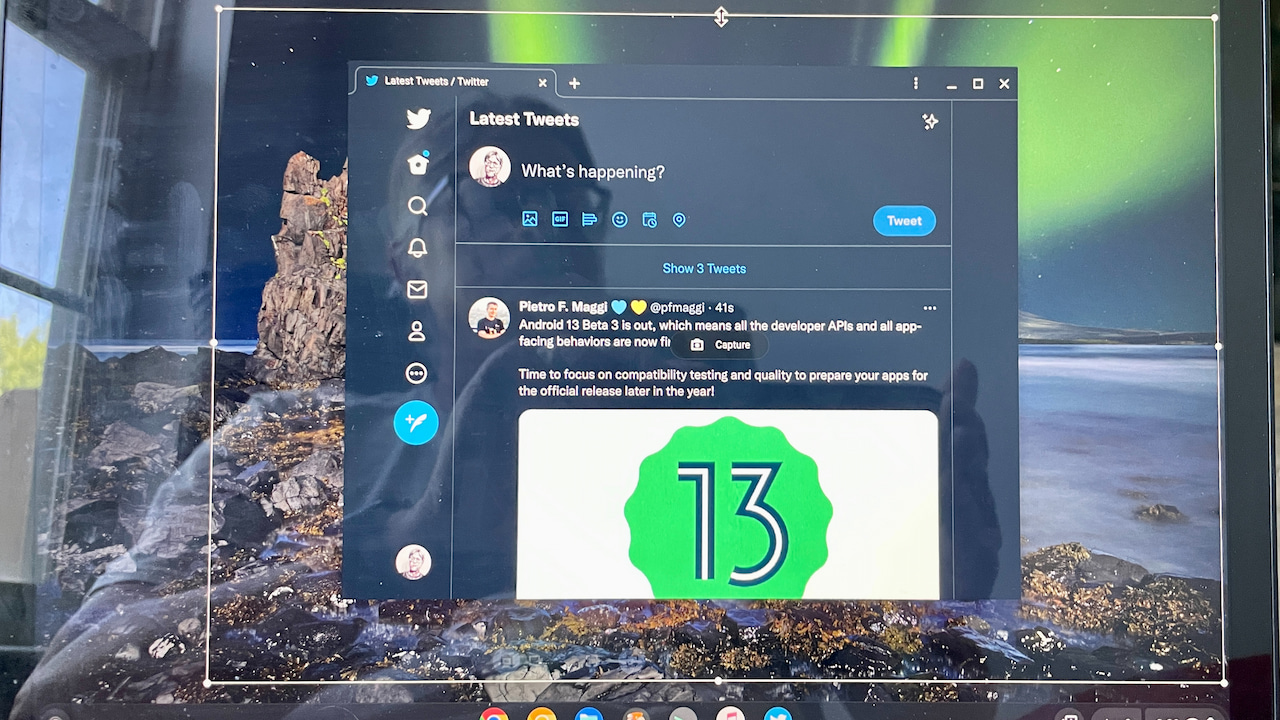
Here’s an example of how the selection tool looks for a partial screenshot:
How to screenshot on a Chromebook using the screen capture button
If you’d rather not use the keyboard shortcuts, recent versions of Chrome OS now have a Chromebook screenshot shortcut screen capture button to accomplish the same thing.
- Click the bottom right of the system tray (where the time appears) to see the Quick Settings menu.
- Click the Screen Capture button; it looks like a square with a small circle in it
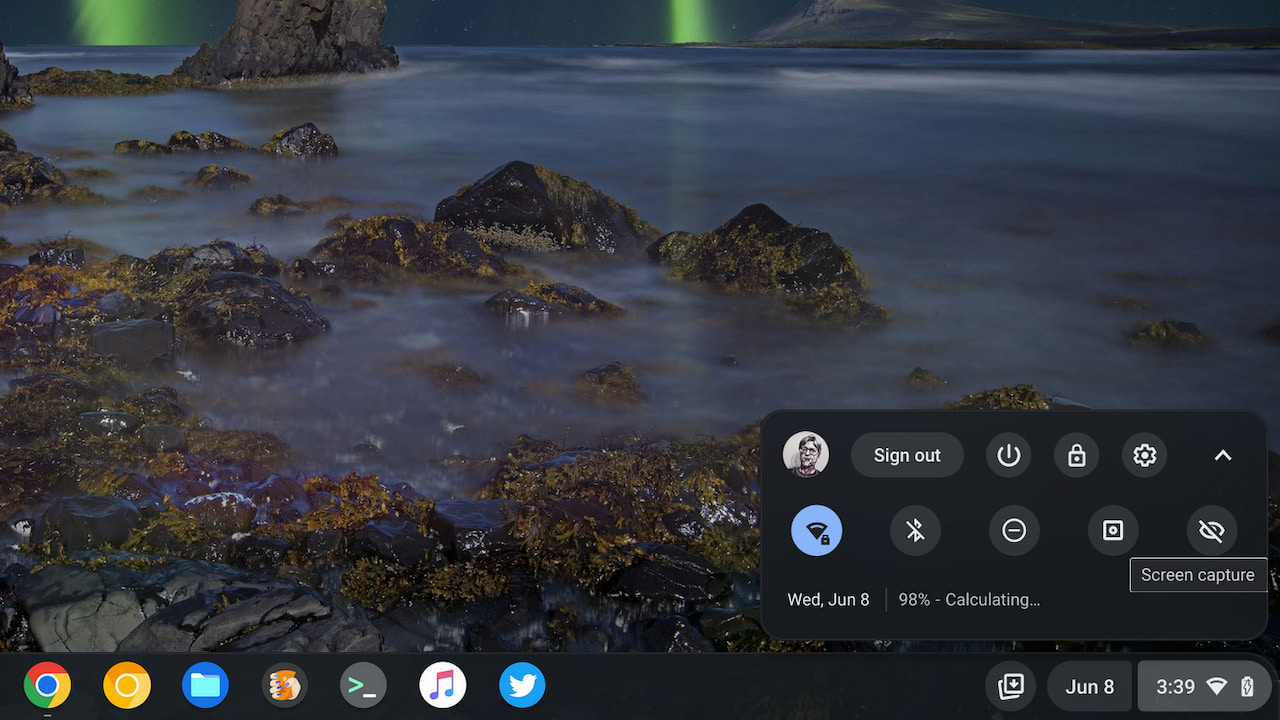
3. You’ll see on-screen options to select a full or partial screenshot, as well as a screen recording button. Choose your preference and your image will be saved in your Files app.
How to edit a screenshot
Once you have your screenshot captured, it’s easy to do basic edits by opening the image file from the Files app.

- Double-click your image in the Files app.
- Use the options at the bottom of the screen, to crop, resize, adjust brightness and contrast, or rotate the image.
- Click the Save button and your edits will be saved to the image in the Files app.
The post How to screenshot on a Chromebook (updated) appeared first on About Chromebooks.