Computers allow us to work faster, but managing tasks often needs multiple windows. Many devices offer tools like shortcuts or gestures to switch between them.
Chromebooks running on ChromeOS offer a convenient split-screen mode. This feature allows users to open and view two windows or apps side by side, making it easier to work on multiple tasks simultaneously.
The split screen functionality is compatible with all Chromebooks but works particularly well on devices with larger displays.
Larger screens provide more space, making multitasking more comfortable and visually appealing.
Using the split screen on a Chromebook is simple and doesn’t require advanced technical knowledge.
Whether you need to compare documents, watch a video while taking notes, or manage several applications simultaneously, this feature enhances productivity.
Below is a step-by-step guide explaining how to activate and use the split screen mode on your Chromebook efficiently.
What Does the Split Screen Do on a Chromebook?
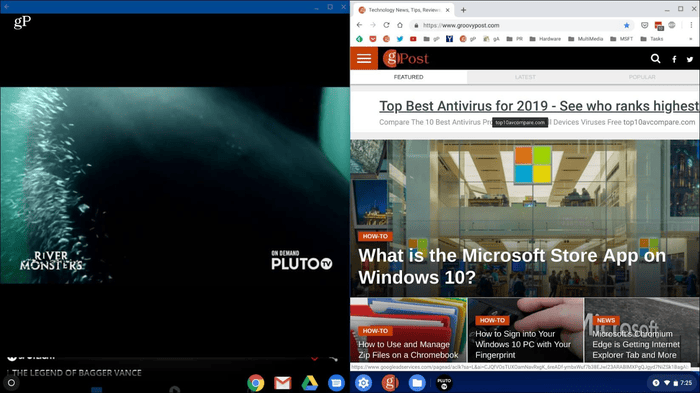
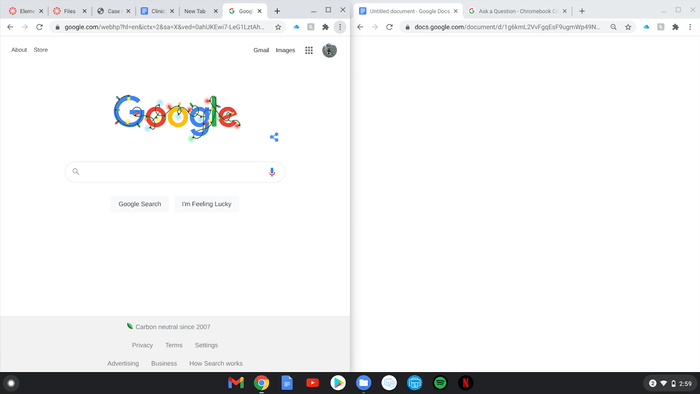
The split screen feature allows you to view two apps or windows on your screen simultaneously.
This setup makes multitasking more accessible by letting you work on both simultaneously. It supports various applications, including Android, progressive web, and browser windows.
There are three main ways to arrange your screen with this feature:
- Partial Mode: One window is larger than the other, with both positioned side by side.
- Split Mode: The screen displays two windows of the same size placed next to each other.
- Float Mode: A smaller window floats over other open applications.
A split screen enhances productivity by helping you efficiently manage tasks, compare information, or run multiple applications.
Reminder
Users can only place windows side by side or as floating by June 2024. Vertical stacking will not be available.
Activating Split Screen Using the Maximize Button on a Chromebook
You can use the Maximize button in the top-right corner of a Chromebook window to enable a split screen. This simple method works well for beginners.
- Open a Chrome browser or any app on your Chromebook.
- Move your mouse pointer to the Maximize button in the window’s top-right corner. The button looks like two overlapping squares.
- A spinning wheel will show and start filling up. When it finishes, the split screen layout options will appear.
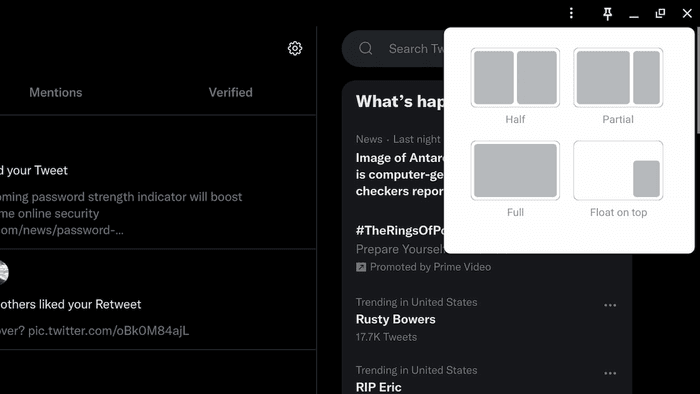
- Move the mouse pointer to the layout you wish to select.
- Click on the side where you want the window to appear.
Do the same for the other window or app on the other side, and you can start multitasking.
How to Set up a Split Screen by Dragging and Dropping
Drag and drop the window to set up a split screen. This method is often the simplest.
- Choose a different Chrome tab or app window.
- Move the pointer to the top of the window and hover over the menu bar where the tab sits.
- Move the window to the desired side of the screen using the trackpad. A preview outline will show where the window will snap into position.
- Release the mouse once the window reaches the desired side of the screen.
You can quickly place windows where you want by using drag and drop.
The post How to Do Split Screen on Chromebook? appeared first on About Chromebooks.