When you think about your smartphone, apps and interfaces are probably the first things that come to mind. Beneath all that surface-level stuff, though, our modern mobile devices are filled with files — folders upon folders of ’em! — just like the clunky ol’ computers we’ve relied upon for ages.
We may not come face to face with our phones’ file systems too often, but it’s valuable to know they’re there — and to know how they can work for us when the need arises. Whether you’re looking to dig up downloaded PDFs and presentations, open up ZIP files that a client emailed you, or move files from your phone to a computer, tablet, or even another Android phone or an iPhone, you’ve got all sorts of options to get down to business.
Here’s everything you need to know to tap into your phone’s file managing and transferring powers.
Manage files on your Android phone
You might not realize it at a glance, but Android actually allows you to access a device’s entire file system — even from the device itself.
The key is finding the right file manager to handle the job. That type of app makes it incredibly easy to browse, search, and interact with all the files stored locally on your device as well as clean up your local storage to free up space. You can even compress or uncompress files and add extra encryption onto especially sensitive items.
You’ll likely need just a single standout Android file manager to handle all of that and then some. I’ve narrowed down the field to two top contenders — one that’s the best all-around option for most professionals and one that offers an extra-advanced and robust file management experience with all sorts of interesting extras.
Check out my Android file manager recommendations and see which path makes the most sense for you, then keep whichever app you end up with handy for on-demand file-wrangling right from your device.
Supplement your phone’s local storage
One little-known feature of Android is its ability to connect with external storage devices like USB memory sticks and even larger-capacity portable hard drives. A phone just has to support something known as USB On-The-Go, or USB OTG, in order for the connection to work.
A fair number of devices, including Google’s Pixel phones and many Samsung Galaxy products, offer such support. If you aren’t sure if your phone does, your best bet is to Google its name along with “USB OTG”; odds are, you’ll find the answer fairly quickly.
Provided your device supports USB OTG, all you need is a USB-A to USB-C adapter like this one made by Amazon. Use the adapter to plug the external drive into your phone, then look for a notification confirming the drive is connected.
Tap the “Explore” option within the notification, and that’s it: You can now browse and access all the files on your external drive.
Look for the notification that pops up when an external drive is connected, and you’ll be browsing the drive’s contents in no time.
JR Raphael / IDG
When you’re finished, don’t forget to go back to the notification and tap “Eject” before disconnecting the drive.
Android file transfers for Windows computers
In addition to supporting external hard drives, your Android device can act as an external hard drive for fast file transfers with any computer. And with a Windows system, it’s especially easy to make that connection.
Just plug your Android device into any open USB port on your Windows computer, then turn on the phone’s screen and unlock it.
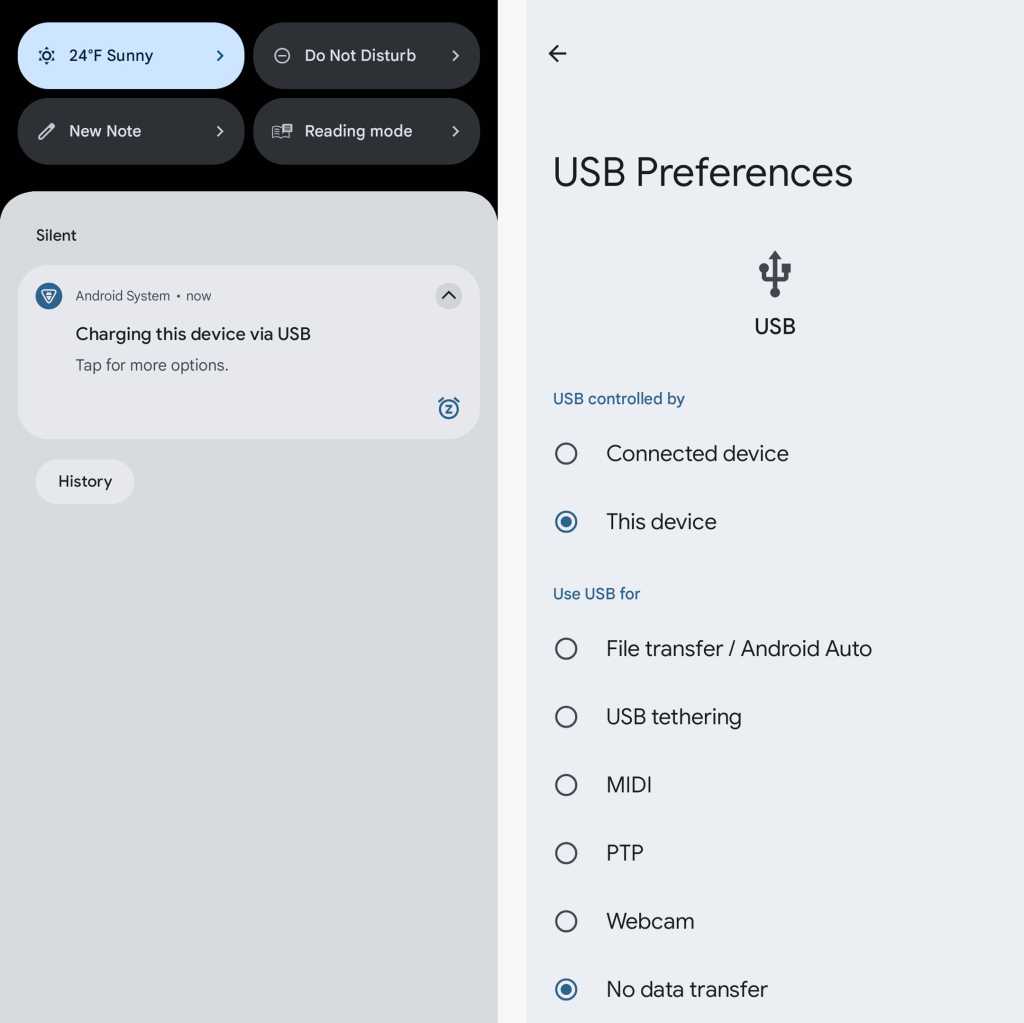
Swipe your finger down from the top of the screen, and you should see a notification about the current USB connection. At this point, it’ll probably tell you your phone is connected only for charging.

After you connect your phone to your computer, a notification will let you prepare it for transferring files.
JR Raphael / IDG
Tap the notification and select “Transfer files” or “File transfer” in the menu that appears. If media files are all you’re planning to move, you could also use the “Transfer photos” (sometimes listed as “PTP”) option, which’ll treat your phone like a digital camera.
Once you’ve made your selection, go to your desktop and open up a File Explorer window — using whatever method lines up with your Windows workflow:
- Click the File Explorer icon in your taskbar
- Open the Start menu and click This PC or Computer
- Click the This PC, Computer, or My Computer icon on your desktop
Then look for an icon representing your phone alongside other portable devices and drives. Click or double-click that icon, and ta-da: You’ll be staring at your Android phone’s internal storage. You can now click around and browse folders, drag and drop files between your phone and PC, or manipulate the data in any way you want — as if it were any other ordinary drive.
Android file transfers for Macs
Got a Mac? The Android file transfer process is a bit more complicated for you — but fear not, for it’s still reasonably easy to get going.
The main difference is that before things will work, you’ll need to download and install a program that’ll allow your Mac to interact with your Android device. Google used to have its own program for this purpose called Android File Transfer, but the company seems to have quietly phased that app out over time (which isn’t entirely surprising, as Mac owners had been complaining about its reliability for years).
What you’ll want instead is the favorably reviewed third-party Commander One. It costs $30 for a single license or $100 for a five-user team license. Once installed and configured, it’ll let you browse your Android device’s storage, transfer files in either direction, and even interact with data on the phone or tablet without transferring anything.
Or — well, skip down to the final section of this story for one other option.
Android file transfers for Chromebooks
You’d expect file transfers between Android phones and Chromebooks to be as simple as can be, considering that Google’s the driving force behind both of those platforms — and by golly, you’d be absolutely right.
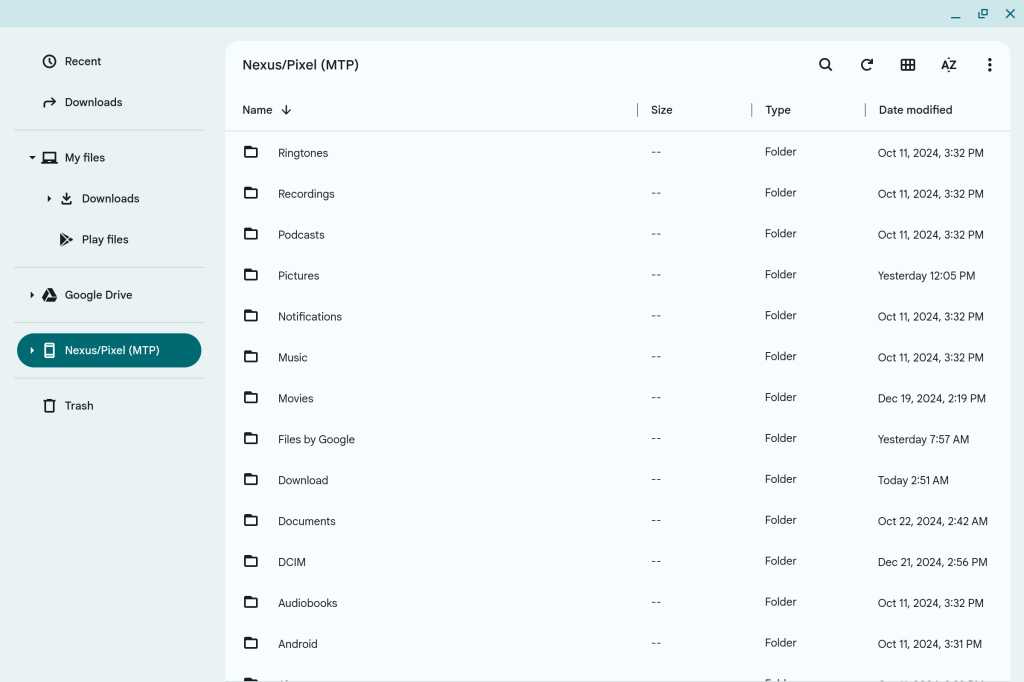
Just like with Windows, all you’ve gotta do to connect your Android phone to a ChromeOS device is plug it into any open USB port on the computer, then tap the USB charging notification on the phone and select the appropriate option for file transferring.
Once you do that, a prompt to open the ChromeOS Files app should automatically appear on your Chromebook, with your phone loaded as the active storage focus. You can then simply drag and drop files in either direction as needed.

Pulling up your Android phone’s storage on a Chromebook is as easy as can be.
JR Raphael / IDG
Told ya it was easy! And you’ve got one more option yet.
Wireless Android file transfers
Good ol’ wired transfers are fast and reliable, sure — but these days, you can also opt to move files from your Android device to another Android device, a computer, or even (gasp!) an iPhone without needing any physical connection.
You’ve got a few possible paths worth considering here:
1. Quick Share (formerly Nearby Share)
Google’s own native-to-Android wireless sharing solution makes it effortless to beam files between any Android device and another Android device, a Chromebook, or a Windows computer. Just use the standard system share command within any app on Android, then select Quick Share from the list of options that pops up and follow the steps that show up to get started.
If the other device is running Android or ChromeOS, search its system settings for quick share to make sure it’s set up and ready to receive. If the other device is a Windows computer, download the official Google Quick Share Windows app to connect it.
And if the other device is running any other operating system, consider one of the next two wireless file-sharing strategies instead.
2. PairDrop
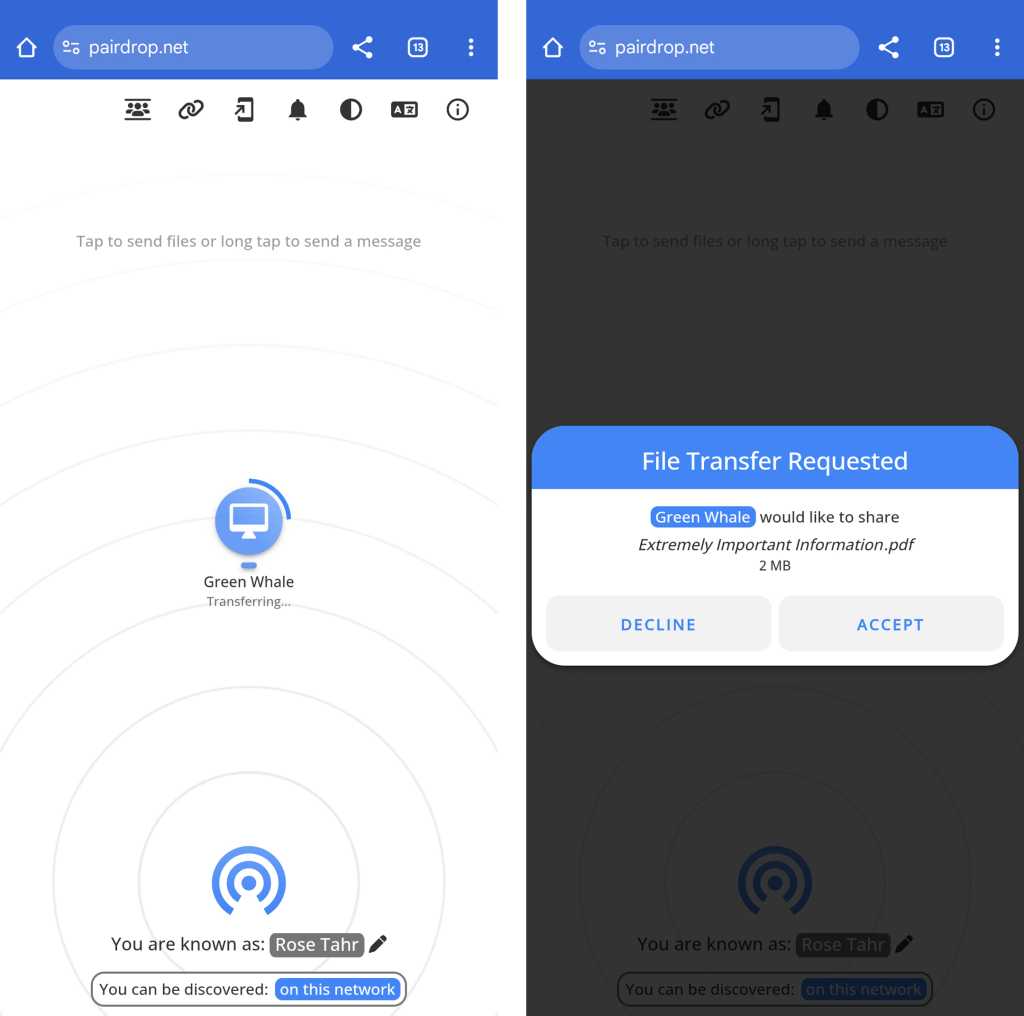
PairDrop is a free and open-source service that lets you wirelessly send files between any devices on the same network, no matter what operating system they’re running.
It works entirely on the web: All you’ve gotta do is open up the PairDrop website on both devices, then click the center area of the screen or drag and drop files to initiate a transfer.

PairDrop brings wireless file transferring to any devices across any platforms — Android, iOS, Mac, you name it.
JR Raphael / IDG
That’s it: No downloads, no sign-ups, no hassles whatsoever. And the service’s open-source code makes it clear that no data is ever stored or even touched by a remote server as part of the process.
3. Cloud storage
If PairDrop isn’t for you and Quick Share isn’t doing the trick, the time-tested tactic of embracing a middleman can get the job done.
Simply pick any cloud storage you like — Google Drive, Dropbox, Microsoft OneDrive, or any other such service. Upload the files you want to transfer into a folder within the respective app on your Android phone, then find the folder within the same app on the receiving device (or vice-versa). Or, if the sharing involves other people, share the folder with them within the same cloud storage service app.
Android file transfer: Automatic syncing with a computer
Maybe you like having certain files stored locally on your Android phone, but you also want those files to be backed up and saved on your computer. The best of both worlds, right?
Believe it or not, this is actually quite easy to pull off. Just grab an Android app called AutoSync, which is available for use with Google Drive, OneDrive, Dropbox, and Box. It’ll let you create pairings between a local folder on your phone and a cloud-based folder — for free with a single folder pair and files smaller than 10MB or for a one-time $5 payment without any real restrictions.
Install the appropriate computer-side app for whichever service you prefer, make sure it’s set to sync with your computer’s hard drive — and there ya have it: Your Android device’s folder is now effectively part of your PC.
You can even have the folders stay constantly synced in both directions — so if you add or update a file on the computer, the same changes will appear on your phone as well.
That’s a wrap!
Congratulations: You’ve officially earned the title of Android file master. (For real — you can even type it into a document, print it out, and tape it to your desk so everyone knows.)
Next up: Make sure you understand the ins and outs of Android backups. They’re ultimately made up of files, too, after all — and pretty important ones, at that.
This article was originally published in August 2017 and most recently updated in January 2025.

