
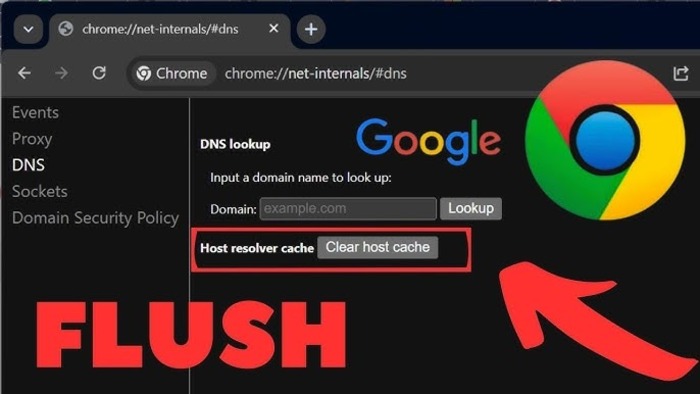
Google Chrome provides a built-in tool for diagnosing DNS-related issues, accessed through chrome://net-internals/#dns.
This tool helps users analyze, clear, and manage DNS cache data, making it easier to troubleshoot browsing issues caused by outdated or incorrect DNS records.
Accessing the DNS Debugging Tool
To open the DNS debugging page in Chrome, follow these steps:
- Open Google Chrome on your computer.
- Type chrome://net-internals/#dns into the address bar.
- Press Enter, and the DNS debugging tool will open.
This page provides insights into Chrome’s DNS cache, allowing users to examine stored records, clear them, and reset network connections when necessary.
Understanding the DNS Cache Section
The DNS debugging tool provides various insights into Chrome’s DNS cache. Below are the key components you’ll find on the page:
| Section | Description |
| Host Resolver Cache | Displays stored DNS records and resolved domain names. |
| Clear Host Cache | It allows clearing all stored DNS records, forcing Chrome to fetch updated ones. |
| Sockets | Shows active socket connections used by Chrome for browsing. |
By understanding these sections, users can diagnose issues related to outdated DNS data, identify problematic domains, and take action to resolve browsing issues.
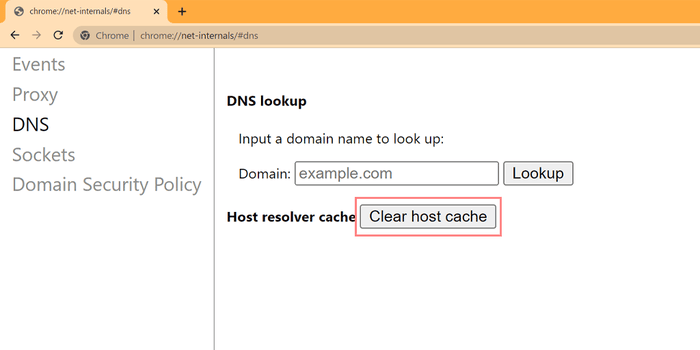
How to Clear the DNS Cache in Chrome
Clearing the DNS cache can help resolve issues caused by outdated or corrupted domain data. Follow these steps to flush the DNS cache in Chrome:
- Open Google Chrome and go to chrome://net-internals/#dns.
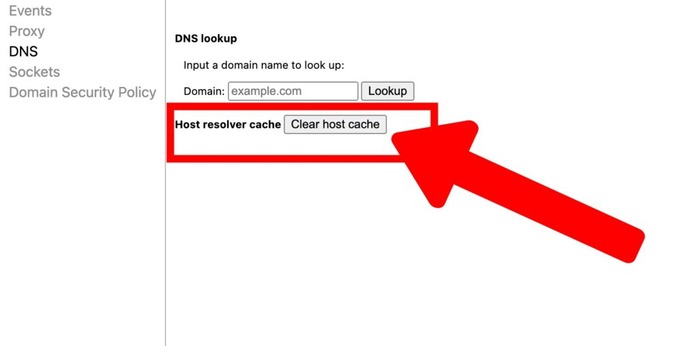
- Locate the Clear host cache button.
- Click it to remove all stored DNS records.
- Restart Chrome if necessary to ensure changes take effect.
This process ensures that Chrome fetches fresh DNS records the next time you visit a website, reducing the chances of encountering connection issues.
Checking Active DNS Entries
To verify whether a website’s DNS information is up to date, follow these steps:
- Open Google Chrome and visit chrome://net-internals/#dns.
- Scroll down to the Host Resolver Cache section.
- Review the stored DNS records to check if they reflect the correct domain information.
This can be useful if a website recently changed its server or IP address and Chrome still uses outdated DNS data.
Resetting Sockets to Fix Network Issues
Sometimes, simply clearing the DNS cache may not resolve connection issues. Chrome also maintains active socket connections, which may need to be reset.
To reset sockets in Chrome:
- Open Chrome and go to chrome://net-internals/#sockets.
- Click on Flush socket pools to reset active connections.
- Restart Chrome to ensure all changes take effect.
Resetting sockets can be helpful when dealing with persistent network issues, such as failed connections or slow-loading web pages.
When to Use the Chrome DNS Debugging Tool
This tool is handy in the following scenarios:
- Websites fail to load despite having a working internet connection.
- A domain’s IP address has changed, but Chrome still uses an old record.
- Users frequently encounter DNS-related error messages, such as “DNS_PROBE_FINISHED_NXDOMAIN” or “ERR_NAME_NOT_RESOLVED.”
- Slow webpage loading due to outdated or incorrect DNS cache entries.
If any of these issues occur, the Chrome DNS debugging tool can help resolve them quickly.
Alternative Methods to Flush the DNS Cache
If clearing the Chrome DNS cache does not fix the issue, you can flush the DNS cache at the system level.
Windows
- Open Command Prompt as Administrator.
- Type the following command and press Enter:
ipconfig /flushdns - Restart your browser and try reaccessing the problematic website.
macOS
- Open Terminal.
- Type the following command and press Enter:
sudo dscacheutil -flushcache - Enter your password if prompted.
- Restart your browser and check if the issue is resolved.
Linux
- Open Terminal.
- For systems using nscd, type the following command and press Enter:
sudo systemctl restart nscd - Reload the affected site to see if the issue persists.
Flushing the system-wide DNS cache can help resolve browsing problems even after clearing Chrome’s internal cache.
Additional DNS Troubleshooting Steps
If flushing the cache does not resolve the issue, consider these additional steps:
1. Change DNS Settings
- Use a public DNS provider such as:
- Google DNS: 8.8.8.8 and 8.8.4.4
- Cloudflare DNS: 1.1.1.1 and 1.0.0.1
- To change DNS settings on Windows:
- Open Control Panel → Network and Internet → Network and Sharing Center.
- Click Change adapter settings.
- Right-click your active network and select Properties.
- Select Internet Protocol Version 4 (TCP/IPv4) and click Properties.
- Use the following DNS server addresses, enter Google or Cloudflare DNS, and click OK.
2. Restart Your Router
- Unplug the router, wait for 60 seconds, and plug it back in.
- Restart your device and check if the issue is resolved.
3. Disable Browser Extensions
- Some extensions, particularly VPNs, ad blockers, or security plugins, can interfere with DNS resolution.
- Disable extensions one by one to check if any are causing the problem.
Conclusion
The chrome://net-internals/#dns tool in Google Chrome is a valuable resource for managing and troubleshooting DNS issues.
Whether clearing the DNS cache, resetting sockets, or checking stored domain resolutions, this tool provides essential functions to improve connectivity.
If problems persist, users can flush the system-wide DNS cache, change DNS settings, or restart their router for a more comprehensive fix.
Following these steps, most DNS-related browsing issues can be quickly resolved, ensuring a smoother online experience.