Chromebooks are gaining popularity, and many users want to know how to use the snipping tool on these devices.
If you’re wondering how to capture and edit screenshots on a Chromebook, you’re in the right place.
This article will walk you through everything you need to know about using the snipping tool on a Chromebook and its features.
What Is the Snipping Tool on Chromebook?
A snipping tool is a simple yet powerful feature that allows users to take screenshots of any area of their screen.
It can capture full-screen shots, specific windows, or selected portions of your screen. Chromebooks have an in-built snipping tool that provides several options for capturing and editing your screen.
This tool helps you quickly snap images of your screen, which can be helpful for work, study, or personal use.
Does Chromebook Have a Snipping Tool?

Yes, Chromebooks have a built-in tool called “Capture,” the snipping tool on Chromebooks.
The Capture tool allows you to take screenshots of the entire screen, specific areas, or windows and even offers basic editing options.
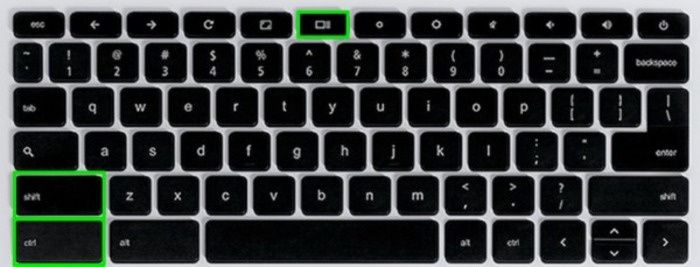
Press “Ctrl” and the “Switch Window” keys to activate it, and the snipping tool will appear. Once you’ve captured your screenshot, you can edit it directly or save it for later use.
How to Use the Snipping Tool on Chromebook?
Snipping differs slightly from other operating systems, such as Windows or macOS, on a Chromebook.
Chromebooks offer multiple snipping modes, including full-screen captures, partial screenshots, and window-specific captures. Here’s how to use each snipping tool mode:
Full-Screen Capture Mode
A full-screen capture allows you to capture the entire screen without cropping any portion. This is the easiest mode to capture everything displayed on your screen.
Steps to take a full-screen screenshot:
- Click the clock icon in the bottom-right corner to open the Quick Settings panel.
- Select “Screen Capture” to open the snipping tool.
- A toolbar will appear. Click on the first icon for “Full-Screen” to capture the entire screen.
Partial Screenshot Mode
Sometimes, you only want to capture a specific area of your screen. The partial screenshot mode allows you to select the exact portion you want to capture, leaving out the rest.
Steps to capture a partial screenshot:
- Open the Quick Settings by clicking the clock in the lower-right corner of the screen.
- Click on “Screen Capture” and choose the “Take Partial Screenshot” option.
- Drag your cursor to select the area you want to capture.
Window-Specific Capture Mode
In addition to full-screen and partial captures, Chromebook users can snip a specific window.
This feature comes in handy when working with multiple windows and wanting to capture only one of them.
Steps to capture a specific window:
- Open the Quick Settings by clicking on the clock in the bottom-right corner.
- Select the “Screen Capture” option to activate the snipping tool.
- Click on the “Specific Window” icon in the toolbar, then select the window you wish to capture.
How to Edit Screenshots on Chromebook?

After capturing a screenshot on a Chromebook, consider editing it before sharing or saving it.
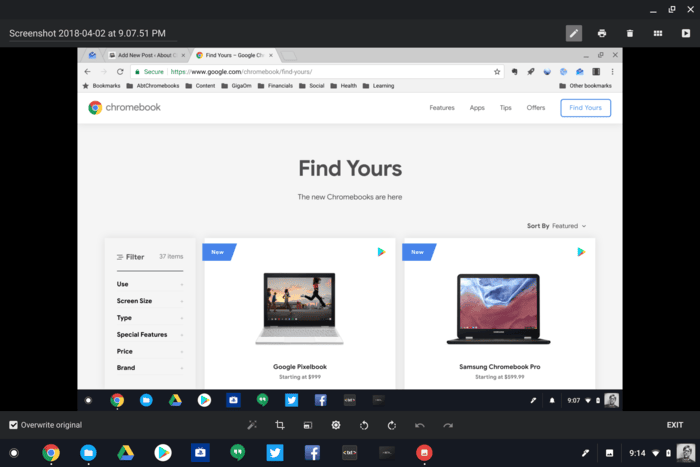
Chromebook includes a basic editor that allows you to crop, annotate, and add text or drawings to your screenshots.
Steps to edit a screenshot:
- Open the “Files” app on your Chromebook.
- Go to the “Downloads” folder and find your screenshot.
- Open the screenshot, and from the toolbar above, choose the editing tools.
- Edit the screenshot as needed and save the changes.
Where Are Screenshots Saved on Chromebook?

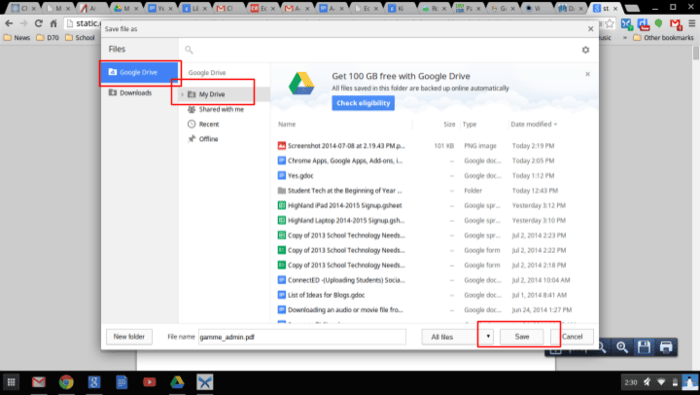
Chromebook automatically saves screenshots in a folder named “Downloads.” This folder can be found in the “Files” app.
Screenshots will be named “Screenshot,” followed by the time and date they were taken, making it easy to find later.
Best Alternatives to Chromebook Snipping Tool
While the built-in snipping tool on Chromebook is quite handy, there are other screenshot tools that you can use for more advanced features. Here are a few popular alternatives:
Gemoo Snap
Gemoo Snap is an excellent option for users who want to modify and take fast snapshots.
Once you capture an image, it’s uploaded to the cloud, where you can enhance it and share it easily.
- Pros:
- Offers quick image capture and cloud sharing.
- Allows for annotations and enhancements.
- Free to use with premium options available.
LightShot
LightShot is a free tool that works on Chromebooks and other devices. It’s available as a browser extension and provides robust editing options.
- Pros:
- Simple interface for capturing and editing screenshots.
- It allows you to save and share directly on Google Drive.
- Free to use.
CloudApp
CloudApp (formerly known as Zight) is a screenshot app that allows users to capture, annotate, and share content easily. It’s cross-platform, working on Mac, Windows, Chrome, and iOS.
- Pros:
- Saves screenshots in the cloud.
- Includes editing tools for annotation.
- Free version with paid plans for additional features.
Greenshot
Greenshot is an open-source, free tool that provides a range of screenshot styles, including scrolling captures. It’s ideal for users who want more flexibility in their screenshots.
- Pros:
- Open-source and free.
- Allows capturing specific areas, windows, or full-screen.
- Customizable settings.
Snagit
Snagit is a more advanced screenshot tool offering a wide range of features. It’s great for users who need more than just simple screenshots, as it allows editing, tagging, and organizing images.
- Pros:
- Provides advanced editing features.
- Allows video capture and screen recording.
- Paid software with a free trial.
Final Thoughts
Knowing how to use the snipping tool on Chromebook is essential for capturing critical information, whether for school, work, or personal use.
Chromebooks come with a built-in snipping tool that allows you to take full-screen, partial, or window-specific screenshots, and it even offers basic editing features.
Several third-party tools like Gemoo Snap, LightShot, and CloudApp offer more advanced features.
No matter which tool you use, capturing and editing screenshots on a Chromebook is easy and efficient.
The post How To Use Snipping Tool on Chromebook? appeared first on About Chromebooks.

