Want to free up space on your computer? With the right tools, you can quickly eliminate gigabytes of unnecessary files and get back to work — or whatever else you use your computer for.
I’ve long argued you don’t need a “PC cleaner” app. You mostly just need the tools built right into Windows. They’ll do the job, whether you’re using a workplace PC or a home computer.
But I do have some useful free downloads to recommend that might speed things up.
Get more Windows knowledge with my free Windows Intelligence newsletter. Plus, get free Windows Field Guide downloads as a special welcome bonus!
Windows space-freeing step #1: Use Disk Cleanup
First things first: The classic “Disk Cleanup” tool built into Windows is still the quickest way to free up space. If your PC recently installed a big Windows update, you might be surprised to see that this tool can free up more than 10GB of storage space in just a few clicks.
To launch it, open the Start menu, search for “Disk Cleanup,” and click the “Disk Cleanup” shortcut.
When it opens, select your C: drive, and click “OK.” After it finishes a quick scan, click the “Clean up system files” button and select your C: drive once again.
You’ll see how much space you can free up here. Look through the list and check whatever you want to remove.
You generally shouldn’t run into any issues with removing most of this stuff. However, watch out for the “Recycle Bin” option — if you check this, Windows will empty your Recycle Bin, and you won’t be able to recover files in it. Also, watch out for the “Previous Windows installations” option. If you see this option here and check it, you’ll free up space — but you won’t be able to “roll back” to the previous Windows update if you ever experience a problem.
When you’re done, click “OK” — and you’ll see a good chunk of space used by temporary files and other clutter freed up for other use instantly.

Chris Hoffman, IDG
Windows space-freeing step #2: Think big
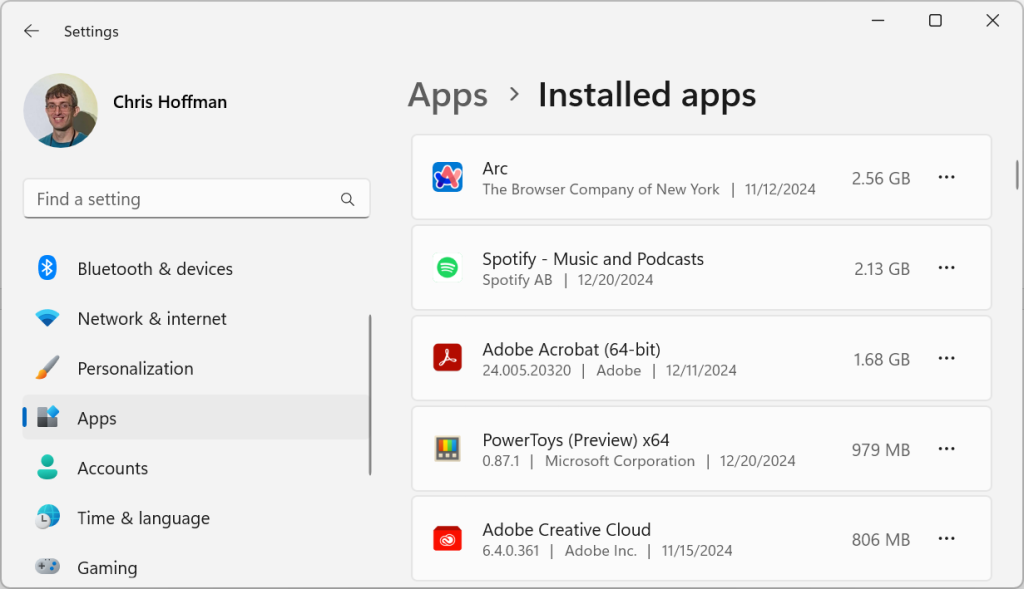
Some programs use quite a bit of space, without any of your own data even playing into the picture. To see just how much each installed application is using, open the Windows Settings app and select Apps > Installed Apps (on Windows 11) or Apps (on Windows 10.)
Tell Windows to sort the apps by “Size,” and it will show you the largest applications at the top of the list. You can uninstall applications from here to free up space.
Bear in mind that this isn’t perfect, though. Many applications don’t show storage space here at all — they’ll have a blank entry in the storage column, even though they may be using lots of space. But it’s still a smart place to start getting a general idea of what’s eating up space and where you can turn to free up precious room.

Chris Hoffman, IDG
Windows space-freeing step #3: Lean on WizTree
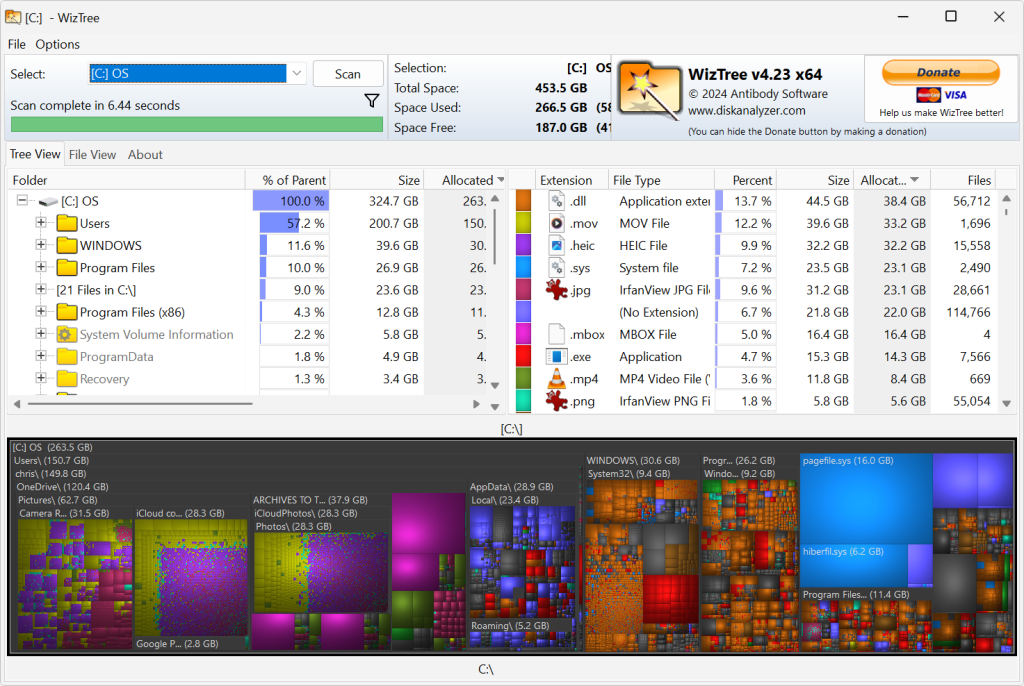
With temporary files cleaned up and a few big applications uninstalled, the next best way to free up space is to see what’s actually using it. I recommend using a free application called WizTree. It’ll give you an overall “bird’s eye view” of exactly what’s using space on your computer.
Install WizTree, launch it, and click “Scan.” WizTree is very fast at scanning your drive — faster than other tools I’ve used and recommended in the past, including the classic WinDirStat.
Just be ready: WizTree will give you a lot of information. Use the visual view at the bottom of the window, though, and you can mouse over areas and see which folders and files are taking up the most room. Perhaps you’ll find an old backup folder you don’t need, or you could discover some apps are using more space than you expect.
From there, you can make informed decisions about which files to move off your computer and which programs to uninstall.

Chris Hoffman, IDG
Windows space-freeing step #4: Turn to the cloud
There’s a good chance you have a lot of files in cloud file storage services like OneDrive, Google Drive, Dropbox, or iCloud Drive. That’s especially true with OneDrive, as OneDrive is built right into Windows, and you get 1TB of cloud storage if you pay for Microsoft 365.
Once you have all that stuff stored safely in such a remote location, there’s a reasonable argument that you no longer need it also taking up space on your own local PC (unless you simply want the redundancy as an extra fail-safe and backup, of course).
You can address this in several ways: First, you can hide certain folders so they don’t sync to your PC. For example, in OneDrive, right-click the OneDrive cloud icon in your system tray, select “Settings,” click the “Account” option, and then click “Choose folders.” You can then uncheck certain folders, and they will never sync to your PC.
OneDrive also downloads files “on demand” as you use them. You can right-click big files in File Explorer and select “Free up space” to save space on your computer. The next time you open that file, OneDrive will automatically redownload it — but it won’t exist in both places and take up room in the meantime.
Windows space-freeing step #5: Seek out Storage Sense
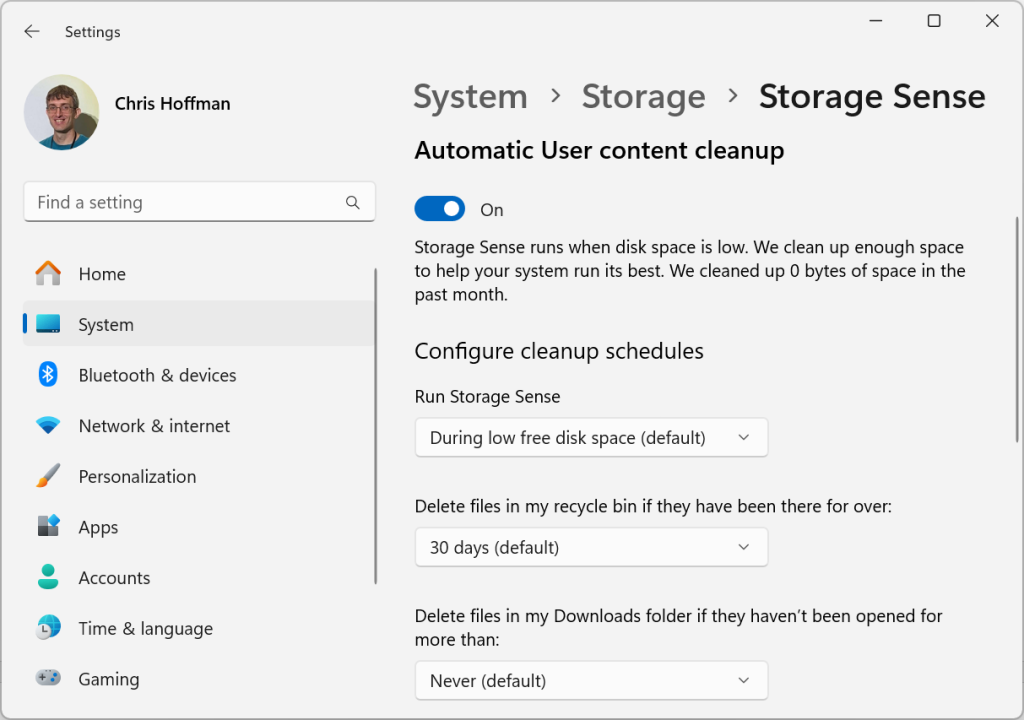
On Windows 10 and 11, the “Storage Sense” interface is the more modern replacement for the Disk Cleanup tool. It offers a variety of unique features that can help you free up space.
You find it by opening the Settings app from your Start menu, clicking “System,” and then “Storage.”
Once you do, on Windows 11, you can select the “Cleanup recommendations” option under Storage Management to see things Windows recommends you remove. Beware: Windows will recommend you delete the contents of your Downloads folder! Depending on how you use that folder, you might not want to check that box.
To allow the service to automatically free up space in the background, meanwhile, click the “Storage Sense” option (on Windows 11) or “Configure storage sense or run it now” (on Windows 10). Use the options there to configure how you want Storage Sense to work. For example, you could have Storage Sense automatically empty your Recycle Bin and delete old files in your Downloads folder whenever your PC’s available disk space gets low.

Chris Hoffman, IDG
Windows space-freeing step #6: Delete duplicates
If you suspect you have duplicate files just wasting space on your PC, it’s a good idea to try a duplicate file-finding tool. You can pin down whether you have duplicate files — and exactly where they are.
I recommend using the classic (and free) dupeGuru tool to scan for duplicates. However, there are a variety of good duplicate file finders out there. Once you’ve identified the unnecessarily cloned files, you can decide what to do with them.
Other ways to get more space
If you’re still seeking digital breathing room after all of that, don’t give up! A little creative thinking about your specific setup can help you find more ways to save space.
For example, if you have a modern Copilot+ PC and are using the AI-powered Recall feature, you can control how much space Recall uses for snapshots from Recall’s settings.
If you’ve looked through all of your apps for similar space-saving opportunities and are still coming up short, the final answer is easy: You should consider getting more storage space. Life is too short to spend endless time micromanaging exactly what’s on your computer’s local storage!
On a desktop PC, you could just buy an external storage drive and plug it in — or upgrade the internal storage. Even on a laptop, you might even be able to insert a microSD card for some extra room for files without adding any extra bulk.
Want to make the most of your Windows PC? Sign up for my free Windows Intelligence newsletter. You’ll get three new things to try every Friday and free copies of Paul Thurrott’s Windows Field Guides as a special welcome gift.

