Chrome devices are becoming versatile and more powerful, offering a decent but basic PC experience.
However, to unlock more Chromebook features , you need to enable Developer Mode.
This article will guide you through the process and highlight some important things to keep in mind.
Important Note: Activating Chrome OS Developer Mode gives you access to features that Google does not officially support. It’s crucial to do your research before trying anything new. Keep in mind that using unsupported or experimental features can lead to issues. If something goes wrong with your device or software, you are responsible for it.
Quick Steps:
To turn on Developer Mode on a Chromebook, follow these steps: Hold down Esc + Refresh, click power button.
Next, select Advanced options, then choose Enable developer mode, and confirm your choice. Finally, choose Boot from the internal disk.
Once finished, your Chromebook will display the setup screen. Just follow the on-screen instructions to complete the setup.
What Is Chrome OS Developer Mode?

It is like getting root access on an Android phone. It gives you greater control over your Chromebook and is perfect for those who enjoy customizing their devices.
However, Developer Mode may not be suitable for everyone. It has some downsides that we will discuss later.
Still, if you want to access the Chrome OS file system for tasks like sideloading Android apps or installing another operating system, Developer Mode is the way to go.
Enabling Developer Mode on a Chromebook

Before you begin, make sure to back up any important files on your device.
Turning on Developer Mode will erase all locally stored data, similar to a factory reset.
Here’s how to enable it:
- Hold down Esc and Refresh keys, then press the power on/off button.
- Find Advanced options, and press Enter when highlighted.
- Select Enable developer mode and hit Enter.
- Choose Confirm
- Some Chromebooks need you to disable OS verification. If prompted, press Enter.
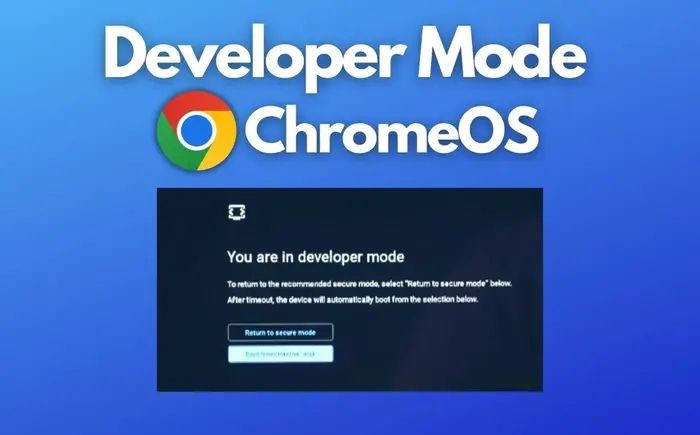
- It will restart, and you’ll see a “You are in developer mode” message.
- Next, choose Boot from the internal disk.
- Be patient as the device restarts. This process may take some time because the software is switching.
- Once it restarts, you’ll see the developer mode message again. Remember, this message will appear every time you turn on the device.
- Again, select Boot from the internal disk.
- Finally, complete the Chromebook setup process when prompted.
How to Turn Off Chrome OS Developer Mode?

Disabling Developer Mode is easier than turning it on, but it can still take some time. Before you begin, make sure to back up your data again.
Turning off Developer Mode will erase everything on your Chromebook.
- When you restart your Chromebook, you’ll see the developer mode message.
- Use the arrow keys to select Return to secure mode and hit Enter.
- Then, hit Enter again to confirm.
- Your device will shut down, and Chrome OS will change to Secure Mode.
- Once this process is complete, your Chromebook restarts, and you’ll go through the setup process again.
Downsides of Developer Mode

Developer Mode may not be suitable for everyone. You need some technical knowledge to make the most of it.
If the drawbacks below concern you, it might be best to avoid Developer Mode.
- Lack of Support: Google does not support Developer Mode. If you face any issues, you will need to troubleshoot on your own, which could void your device’s warranty.
- Disabled Security: All security features are turned off when Developer Mode is active.
- Data Loss Risk: You will lose local data when you enable or disable Developer Mode. Be cautious when turning it off, as accidentally pressing the Spacebar at the wrong moment could result in data loss again. It’s wise to keep making backups if you are working on anything important.
- Slower Boot Time: Chromebooks usually start up very quickly, but enabling Developer Mode slows this down. You will see a warning screen every time you turn on your device.
The post Chrome OS Developer Mode Activation And Features appeared first on About Chromebooks.

