Hey. You. Yes, you there — the one with your overly moist eyeballs pointed at the screen. What if I were to tell you that that the browser you rely on for all of your web-based exploring on Android had oodles of extra features — top-secret settings that’d add awesome powers into your mobile browsing adventures and make wiggling your way around this wacky ol’ web of ours meaningfully faster, more enjoyable, and more productive?
Well, provided you’re using Google’s Chrome browser for Android, that’s as true as true can be. And best of all, it doesn’t take much to uncover all of Chrome’s carefully concealed treasures — if you know where to look.
The six settings on this page will make your Android-based web browsing more powerful, more efficient, and generally just more pleasant. They’re all just sitting there waiting to be found, too — so really, why not take advantage of what they have to offer?
Before we spelunk any further, though, one quick word of warning: All of these settings are connected to Chrome’s flags system, which is a home for under-development options that are still actively being worked on and aren’t technically intended for mainstream use. The flags system is meant for expert users and other similarly informed (and/or insane) folk who want to get an early look at advanced items. It also evolves pretty regularly, so it’s entirely possible some of the settings mentioned here may look different from what I’ve described or even be gone entirely at some point in the not-so-distant future.
What’s more, Chrome’s flags system has loads of advanced options within it, some of which could potentially cause websites to look weird, Chrome itself to become unstable, or even your ears to start spewing a delightfully minty steam. (Hey, you never know.) So in other words: Proceed with caution, follow my instructions carefully, and don’t mess with anything else you encounter in this area of the browser unless you actually understand it and know what you’re doing.
Got all that? Good. Now, let’s give your browser some spiffy new superpowers, shall we?
Chrome Android setting #1: Your custom web step-saver
One of my favorite tucked-away Chrome features is the relatively recent addition of a custom button for the browser’s toolbar. Have you found that yet?
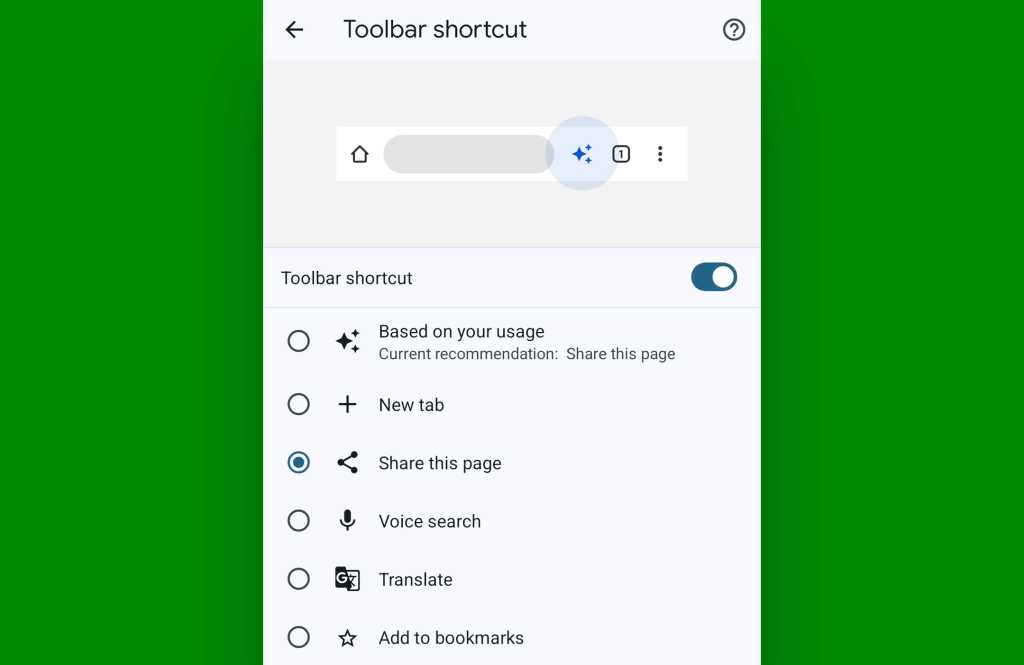
The feature adds an extra shortcut into your browser’s top bar — and what makes it especially cool is that the shortcut can be for whatever function you use the most, with a list of possibilities that keeps growing.
[Psst: Love shortcuts? My Android Shortcut Supercourse will teach you tons of time-saving tricks for your phone. Sign up now for free!]
At this point, you can set the button to serve as a one-tap command for sharing a page, starting a new tab, starting a new voice search, firing up an instant page translation, or adding the currently opened page into your browser bookmarks.
You can also opt to have Chrome decide for you and dynamically change that button based on which of those actions it thinks you’re most likely to use at any given moment.

JR Raphael, IDG
The customizable button actually seems to be available without any under-the-hood tinkering for many Android-appreciating animals at this point. If you already have it, you can dig up the option and take total control of it by tapping the three-dot menu icon in Chrome’s upper-right corner, selecting “Settings” followed by “Toolbar shortcut,” and then activating the toggle at the top of the screen that comes up next.

JR Raphael, IDG
If you aren’t seeing that section in your Chrome Android settings, don’t fret! With the flick of a few quick switches, you can force that shiny new system to show up for you:
- First, type chrome:flags into your Chrome Android app’s address bar.
- Then type adaptive button into the search box on the screen that comes up.
- See the line labeled “Adaptive button in top toolbar customization”? Tap the box beneath that and change its setting from “Disabled” to “Enabled.”
- Tap the blue Relaunch button at the bottom of the screen.
Now, while we’re thinking about improvements that’ll affect your entire Android web browsing experience…
Chrome Android setting #2: A dark mode upgrade
Android’s Dark Theme is a delightful way to make your virtual world a little easier on the eyes, especially in the evening hours or anytime you’re in a dim setting — say, a server room deep in the bowels of your company workplace or maybe a gigantic vat of Velveeta after you’ve been shrunken down to a tiny Lego-character size.
But oddly enough, using the system-wide Dark Theme toggle doesn’t actually affect the web. Most sites still show up bright as day and as a harsh contrast to the dim, mellow vibes the rest of Android offers up in that context.
Well, here’s the fix:
- Once again, type chrome:flags into your browser’s address bar.
- Now type dark into the search box on the screen that comes up.
- See the line that says “Darken websites in themes settings”? Change its setting from “Default” to “Enabled.”
- Smack that splendid Relaunch button at the bottom of the screen. (Don’t worry. It likes it.)
Once your browser restarts, head back into its settings (via that three-dot menu icon in the upper-right corner). Tap “Theme,” and you should see a new checkbox beneath the “System default” option:

JR Raphael, IDG
Make sure that box is checked and active. Then, all that’s left is to activate your device-wide Dark Theme — either via the Quick Settings toggles connected to your notification panel or within your system settings — and go pull up any ol’ website you want. You should see the site magically transformed into a dark motif for your peeper-pleasing pleasure.

JR Raphael, IDG
Ooh, ahh, etc.
Chrome Android setting #3: Zippier zooming
Let’s face it: Most of us aren’t getting any younger. (I say “most of us” ’cause there’s always that one dude who somehow seems to age backwards and look better with every passing year. We’re on to you, Josh from accounting.)
And sometimes, certain websites have a tendency of making their text Too Damn Small™ for our aging eyes. (Not that I’ve ever had that problem or anything…)
Android’s got ample options for increasing text size on a browser-wide basis or even across your entire device, but the reality is that text size isn’t always the same from one virtual stomping ground to the next. And on the web in particular, one site’s squintily sized text standard might live alongside another site’s perfectly fine word size choices.
Fear not, though, for I’ve got your back. Google’s Chrome Android app has a still-hidden option that makes it exceptionally easy to adjust text size on a site by site basis as you’re working your way around the World Wide Webbitudes:
- Start by typing chrome:flags into your browser’s address bar (feeling familiar yet?).
- Next, type zoom into the search box on the screen that comes up.
- Find the line labeled “Accessibility Page Zoom” and change its setting to “Enabled.”
- Sing a jaunty little sea shanty, for good measure.
- And finally, tap the Relaunch button at the bottom of the screen.
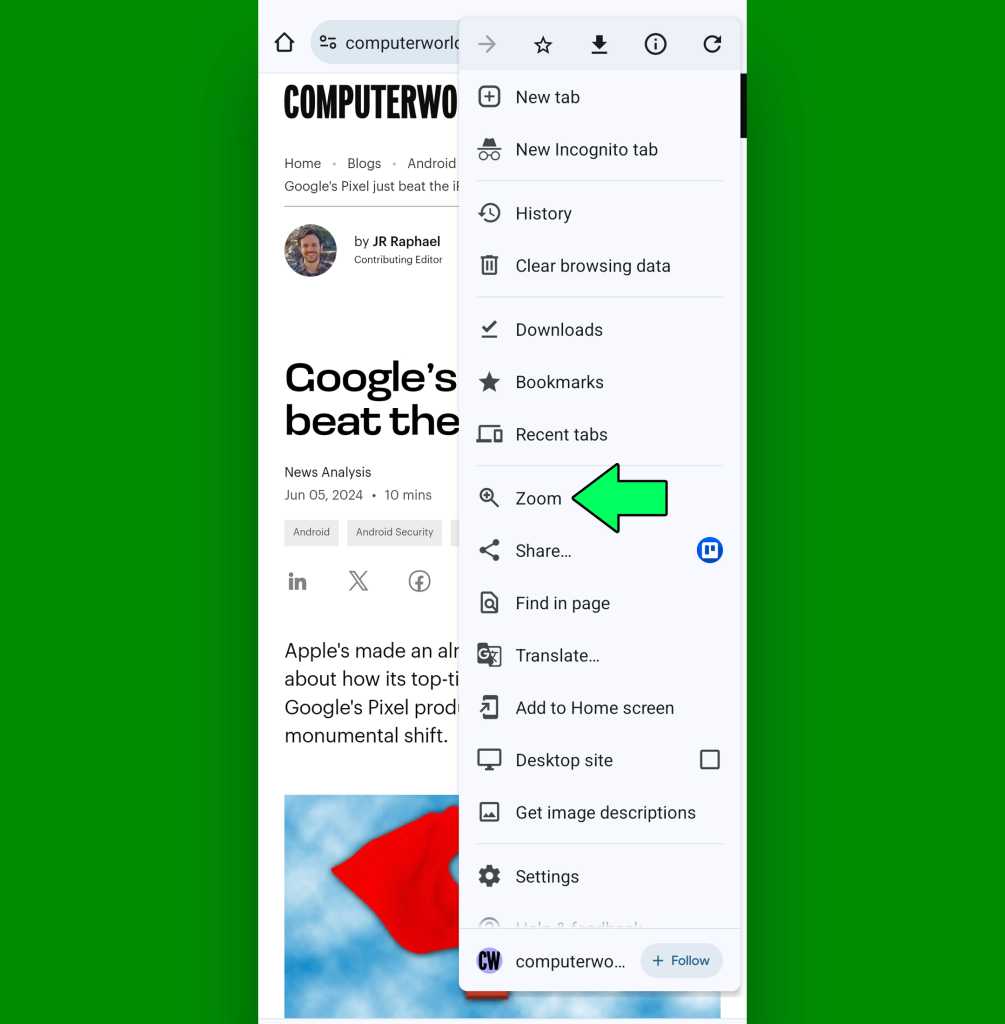
Now, get this: Once your browser comes back, you can open up any site, anywhere on the web, and look in Chrome’s main three-line menu icon to find a new “Zoom” option.

JR Raphael, IDG
Tap that son of a gibbon and tap it good, and you’ll get a floating zoom bar right atop whatever page you’re viewing.

JR Raphael, IDG
Best of all? Whatever changes you make to that site’s zoom settings should stick and then continue to apply for that specific site and that site only moving forward.
Chrome Android setting #4: On-demand podcastification
While we’re thinking about easy browsing experience enhancements, let’s take a sec to treat ourselves to some effortless aural pleasure.
You’d never know it, but the Chrome Android app now has an integrated option for transforming any page you’re viewing into an on-demand personal podcast — so you can hear the text read aloud as you go about your morning commute, your post-lunch yoga and/or yogurt session, or your post-Zoom-meeting dancing break when you’re sure no one can see you. (I’m not the only one who does that, right?)
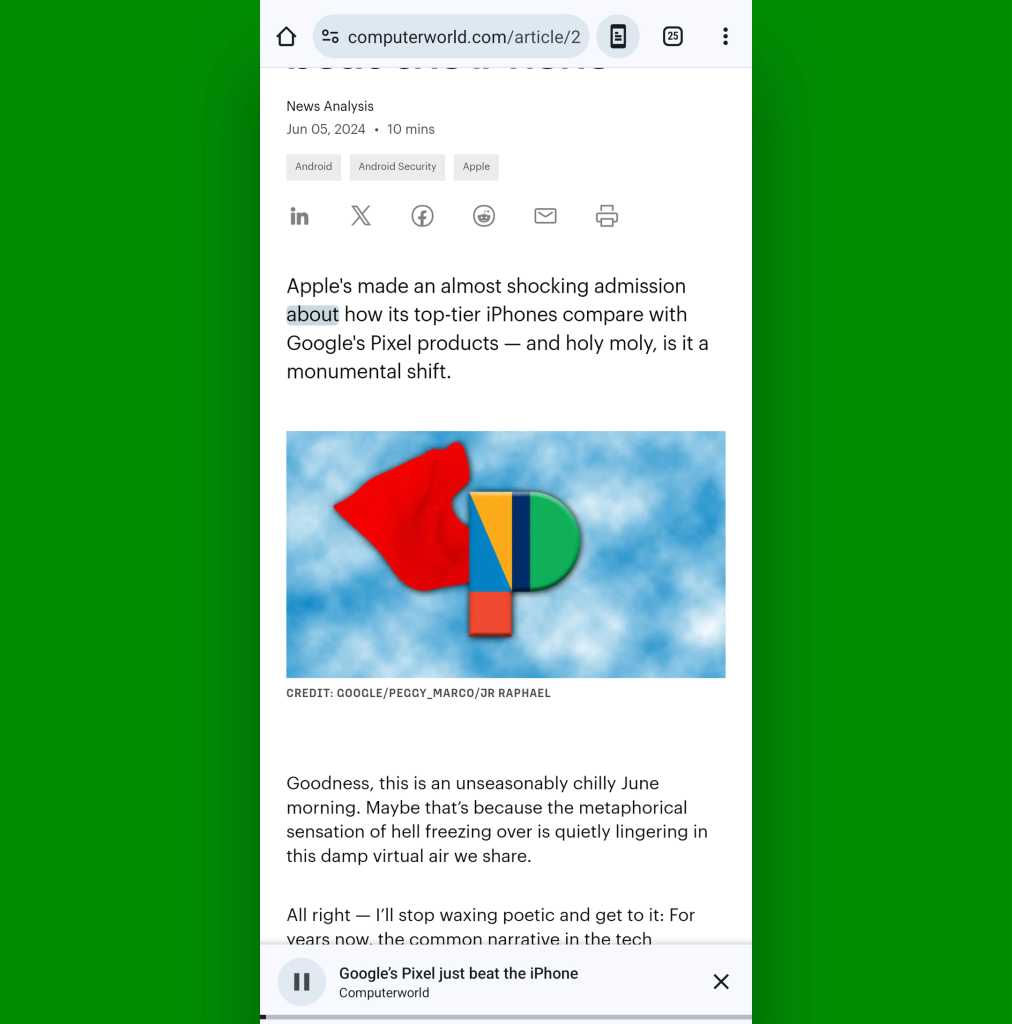
Once activated, you’ll find the option within the main Chrome menu to listen to any compatible page. All you’ve gotta do is tap it, aaaand…

JR Raphael, IDG
How ’bout that? Chrome will read all the text out loud to you, just like your own adult version of storytime (with up to 97% more Important Business Information™!)
Here’s how to make it happen:
- Type — yup, you guessed it — chrome:flags into your browser’s address bar.
- Type read aloud into the search box on the screen that comes up.
- Tap the line labeled “Read Aloud” and change its setting from “Disabled” to “Enabled.”
- Tap the Relaunch button at the bottom of the screen.
After your browser restarts, just open up any ol’ article and tap that three-dot menu icon in Chrome’s upper-right corner. You should see the new “Listen to this page” option there and waiting.
As an added bonus, you can also now find the read-aloud command as an option within the custom address bar button we went over at the start of this saga — if you want even easier on-demand access to it.
And don’t forget, too, about Android’s system-wide Reading Mode, which lets you load an entire reading-optimized interface for practically anything on your device — on the web or beyond — and then optionally have it read aloud to you from there, too.
Chrome Android setting #5: Smarter website permissions
Over the years, Android’s gotten much smarter about sensitive device permissions by introducing more nuance into the equation. When it comes to things like location, you can opt to allow an app only limited access — for a single session — rather than having to make an all-or-nothing, never-or-forever-style decision.
Amazingly, this same concept is only just now starting to make its way to the web. And as of this moment, the onus is still on you to manually activate it if you want the advantage of that added flexibility on the Chrome Android front.
Luckily, it’s easy to do:
- Crack those phalanges and type chrome:flags into your browser’s address bar once more.
- This time, type one time permission into the search box at the top of the screen.
- Find the “One time permission” line and change its setting from “Default” to “Enabled.”
- Press your purty little pinky into the Relaunch button at the bottom of the screen.
Now, the next time a site asks to access your location, mic, or camera, you can opt to allow it to do so only that one time — without granting it eternal permission to that level of access.

JR Raphael, IDG
Much more sensible, wouldn’t ya say?!
Chrome Android setting #6: Limitless screenshots
Last but not least in our list of secret Chrome Android treasures is a subtle but significant improvement that’s made a definite difference in my day-to-day web doings.
It’s a 10-second tweak that lifts a long-standing limitation around when you can capture screenshots on the web — specifically allowing you to snag a screenshot whilst viewing a site in Chrome’s incognito mode, if you’re ever so inspired.
I tend to use incognito mode anytime I want to see a page without being signed into the associated site, whether that’s Google or a company-connected web page. And I’ve found myself frustrated more than a few times when I try to capture a screenshot in that scenario and end up with a blank, useless image as the result.
So here’s the fix:
- One last time, type chrome:flags into your browser’s address bar.
- Type incognito into the search box at the top of the next screen.
- Find “Incognito Screenshot” and change its setting from “Default” to “Enabled.”
- And hammer down your ham-scented hand onto that Relaunch button at the bottom.
Told ya it was easy, right? Now you can capture away all around the web, incognito or not — and you can smugly enjoy the knowledge that you’re a step ahead and enjoying under-development features before anyone else even knows about ’em.
And yes, that includes Josh from accounting — that fresh-faced but stale-browsered showoff.
Hey, small victories, right? We’ll take what we can.
Ready for even more advanced Android knowledge? Sign up for my free Android Shortcut Supercourse to learn tons of time-saving tricks!

